> ## Documentation Index
> Fetch the complete documentation index at: https://docs.typewise.app/llms.txt
> Use this file to discover all available pages before exploring further.
# User Management
> Manage user access, roles, and permissions within your organization
Adding users allows your team members to access Typewise, handle customer
conversations, and manage configurations according to their role. You can assign
roles, channels, and teams right from the user creation window.
***
## Instructions
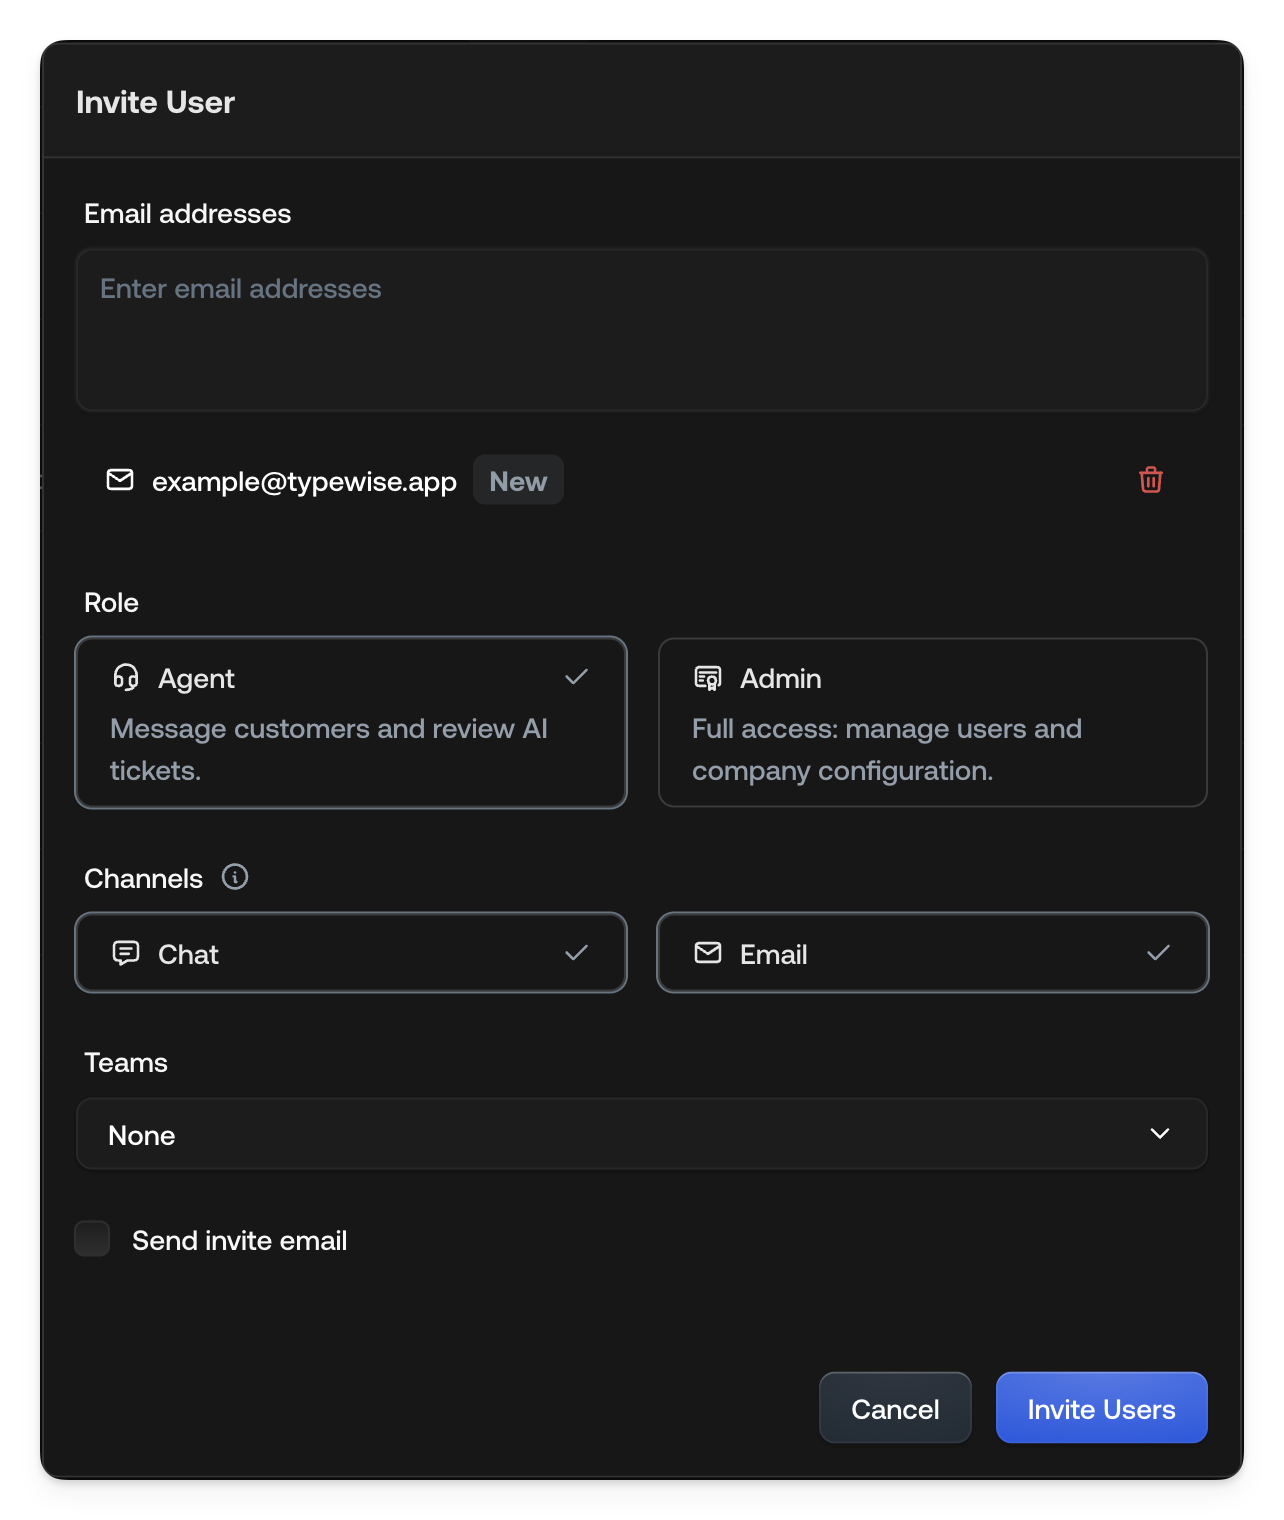
Go to [User Management](https://platform.typewise.app/settings/users) and
click **Add User**.
In the Email addresses field, enter one or multiple email addresses.
Select the user's role: - **Agent** - Can message customers and review AI
tickets. - **Admin** - Full access to manage users and overall company
configuration.
Choose Channels the user will handle: **Chat** and/or **Email**.
Assign the user to a Team. Select an existing team from the dropdown, or
leave as None if not yet assigned.
Optionally, check the box **Send invite email** if you want Typewise to
email the invitation.
Click **Invite Users**.
## Tips
* Always double-check role permissions before sending the invite.
* You can edit user roles and channels anytime later in User Settings.
* Editing a user opens the same details they see on their own
[profile](/documentation/settings/profile), so you can set someone's photo or
fill in their [user properties](/documentation/settings/user-properties) on
their behalf.
 ## See also
* [Team Management](/documentation/settings/team-management): Organize users
into teams
* [User properties](/documentation/settings/user-properties): Define the details
each agent carries
* [Profile](/documentation/settings/profile): What each user can set for
themselves
* [Company configuration](/documentation/behavior/company): Set global
guidelines
## See also
* [Team Management](/documentation/settings/team-management): Organize users
into teams
* [User properties](/documentation/settings/user-properties): Define the details
each agent carries
* [Profile](/documentation/settings/profile): What each user can set for
themselves
* [Company configuration](/documentation/behavior/company): Set global
guidelines