> ## Documentation Index
> Fetch the complete documentation index at: https://docs.typewise.app/llms.txt
> Use this file to discover all available pages before exploring further.
# Tickets
> Browse current and historical tickets
## Overview
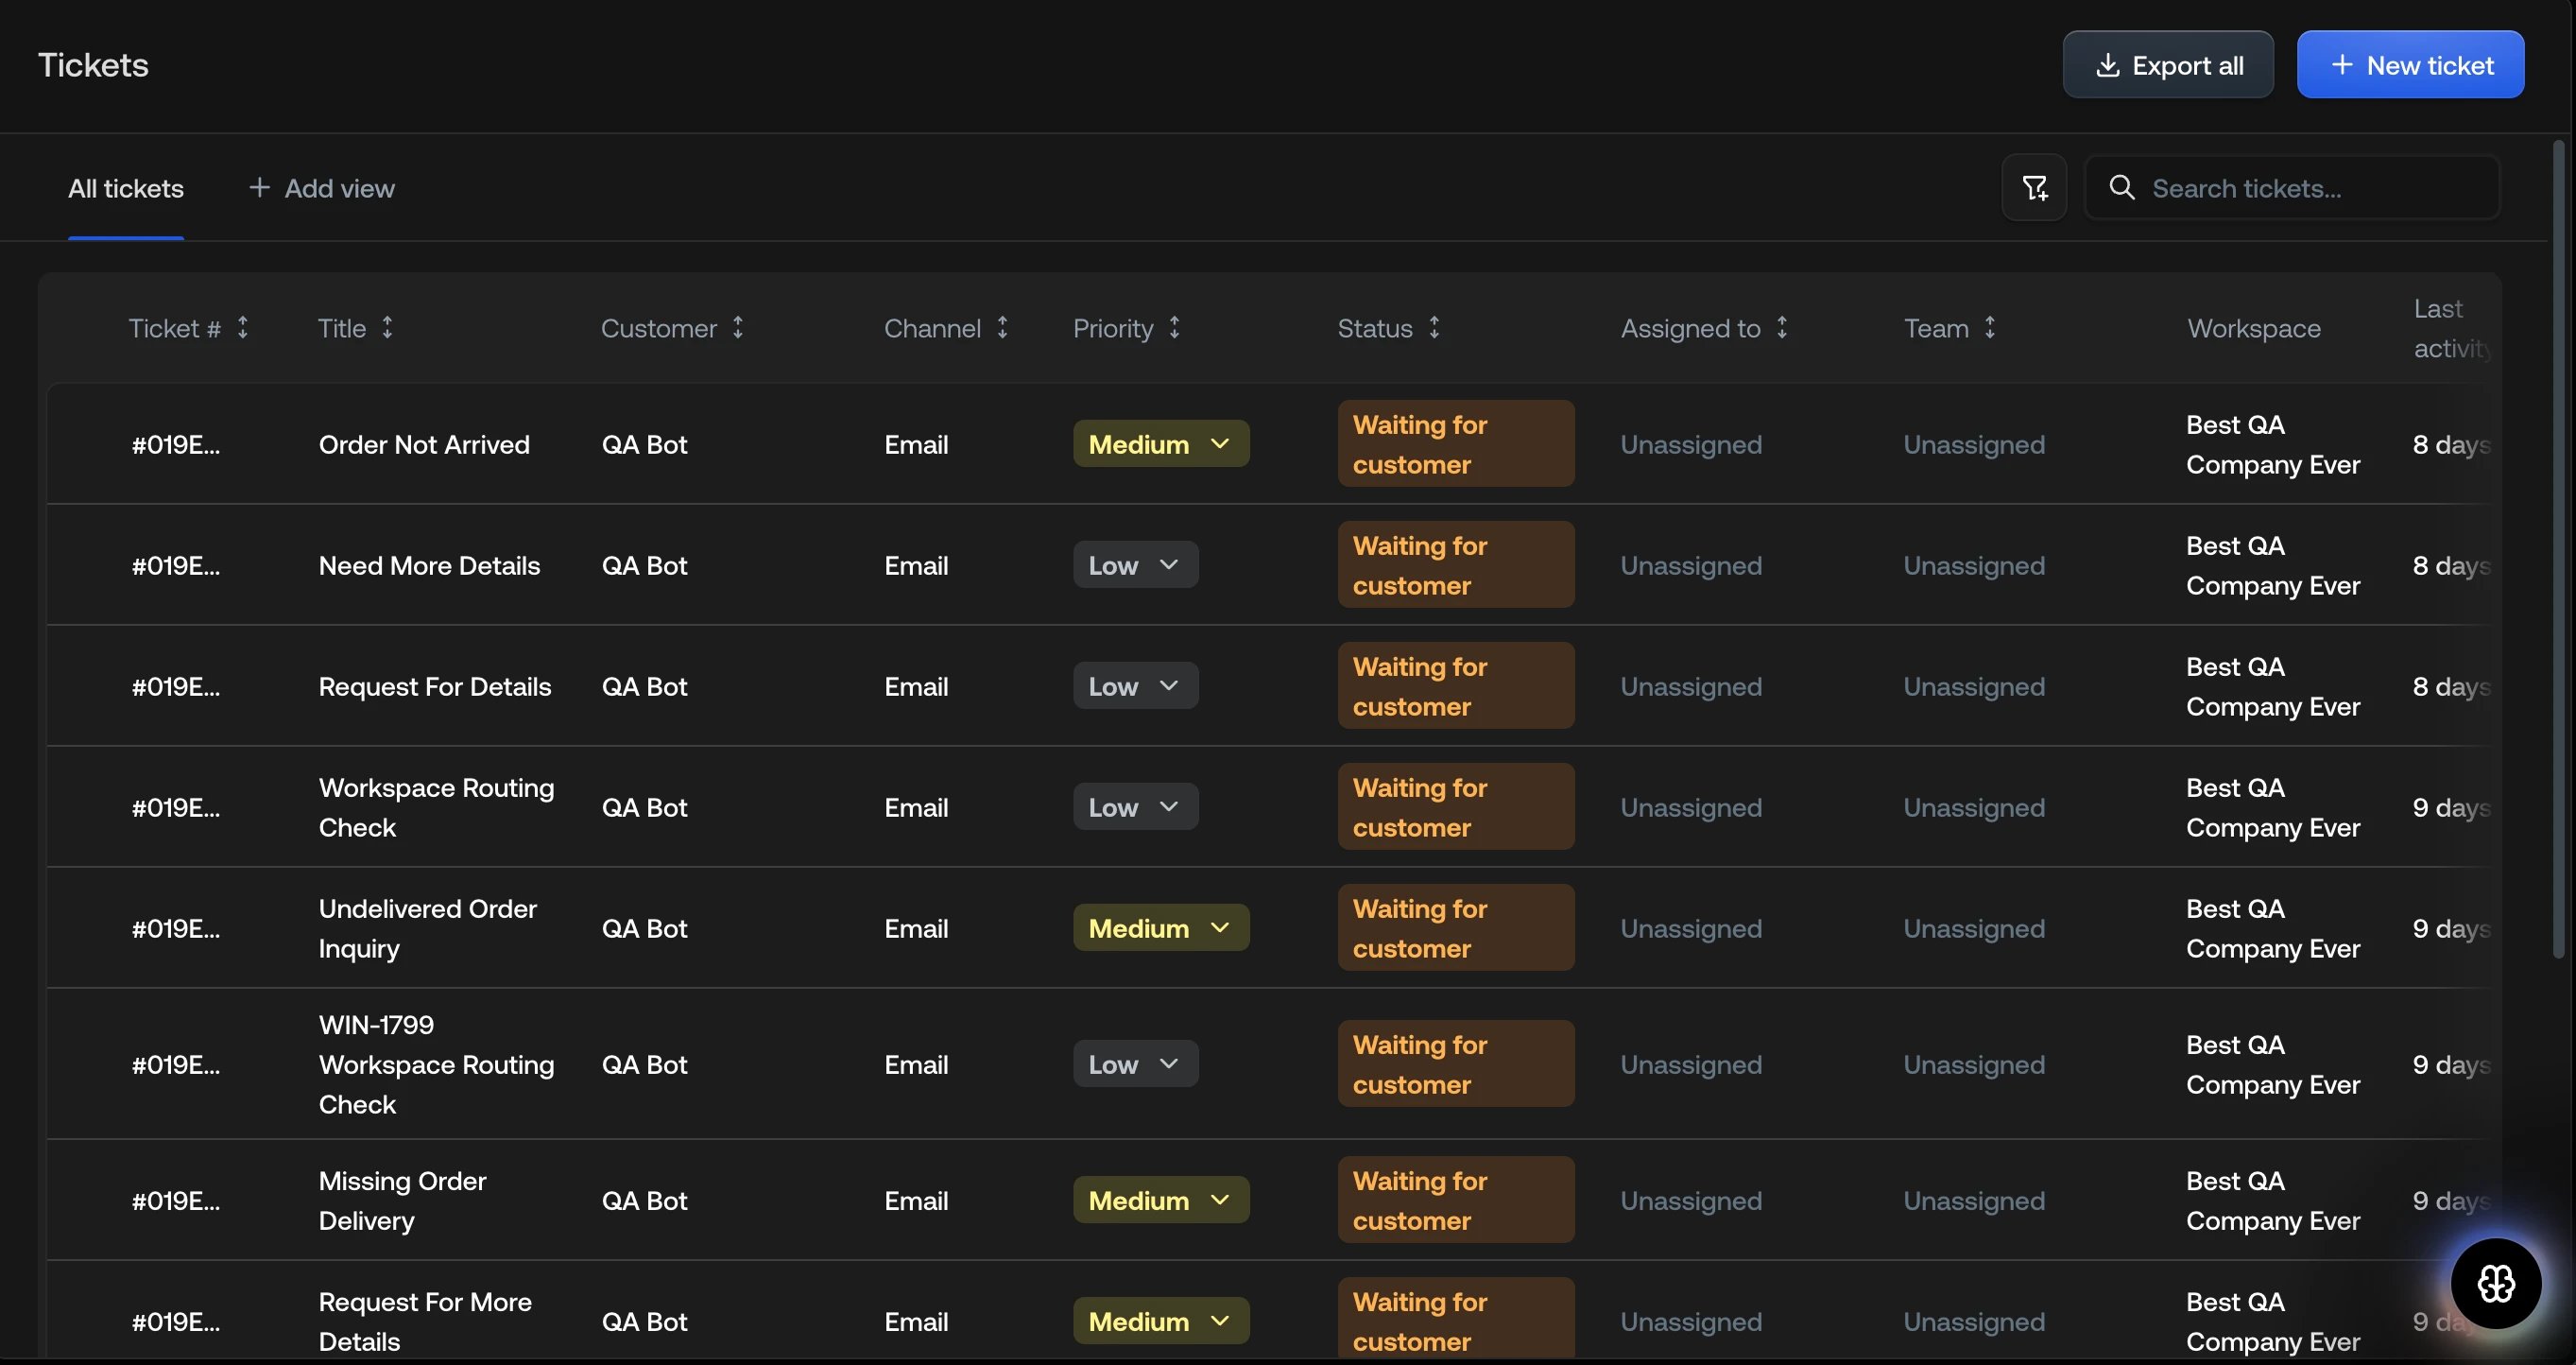
The [Tickets](https://platform.typewise.app/tickets) view allows you to
browse all tickets, regardless of whether they've been handled by you, another
agent or the AI. This view is useful for team leads to track the status of all
tickets and for Human Agents to see all their assigned tickets, including those
where you wait for customer input.
 ***
## Searching tickets
Using the search field you can search the following fields. Search is processed
in real time as you type.
***
## Searching tickets
Using the search field you can search the following fields. Search is processed
in real time as you type.
 **Available search fields:**
* Ticket title
* Customer name
* Customer email
* Assignee name
* Team name
* Channel type
***
## Filtering tickets
We support filtering tickets using a combination of filters, similar to tools
like Linear. Filters allow you to narrow down the ticket list to find exactly
what you're looking for.
### Adding a filter
Click the **Add filter** button.
Select a filter field from the dropdown.
Choose the values you want to filter by.
**Available search fields:**
* Ticket title
* Customer name
* Customer email
* Assignee name
* Team name
* Channel type
***
## Filtering tickets
We support filtering tickets using a combination of filters, similar to tools
like Linear. Filters allow you to narrow down the ticket list to find exactly
what you're looking for.
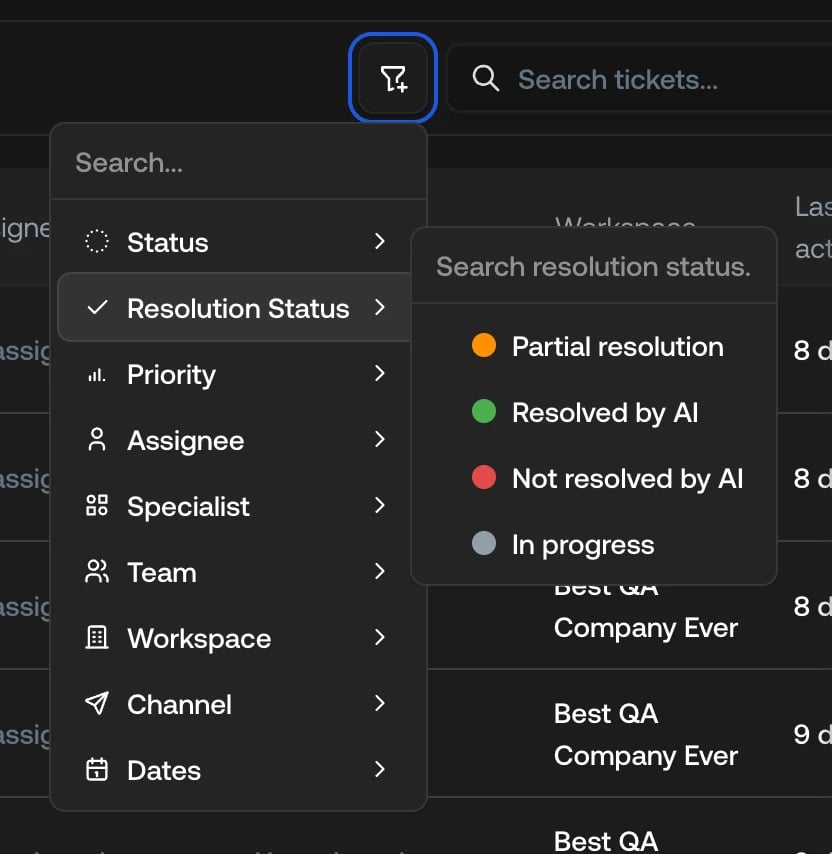
### Adding a filter
Click the **Add filter** button.
Select a filter field from the dropdown.
Choose the values you want to filter by.
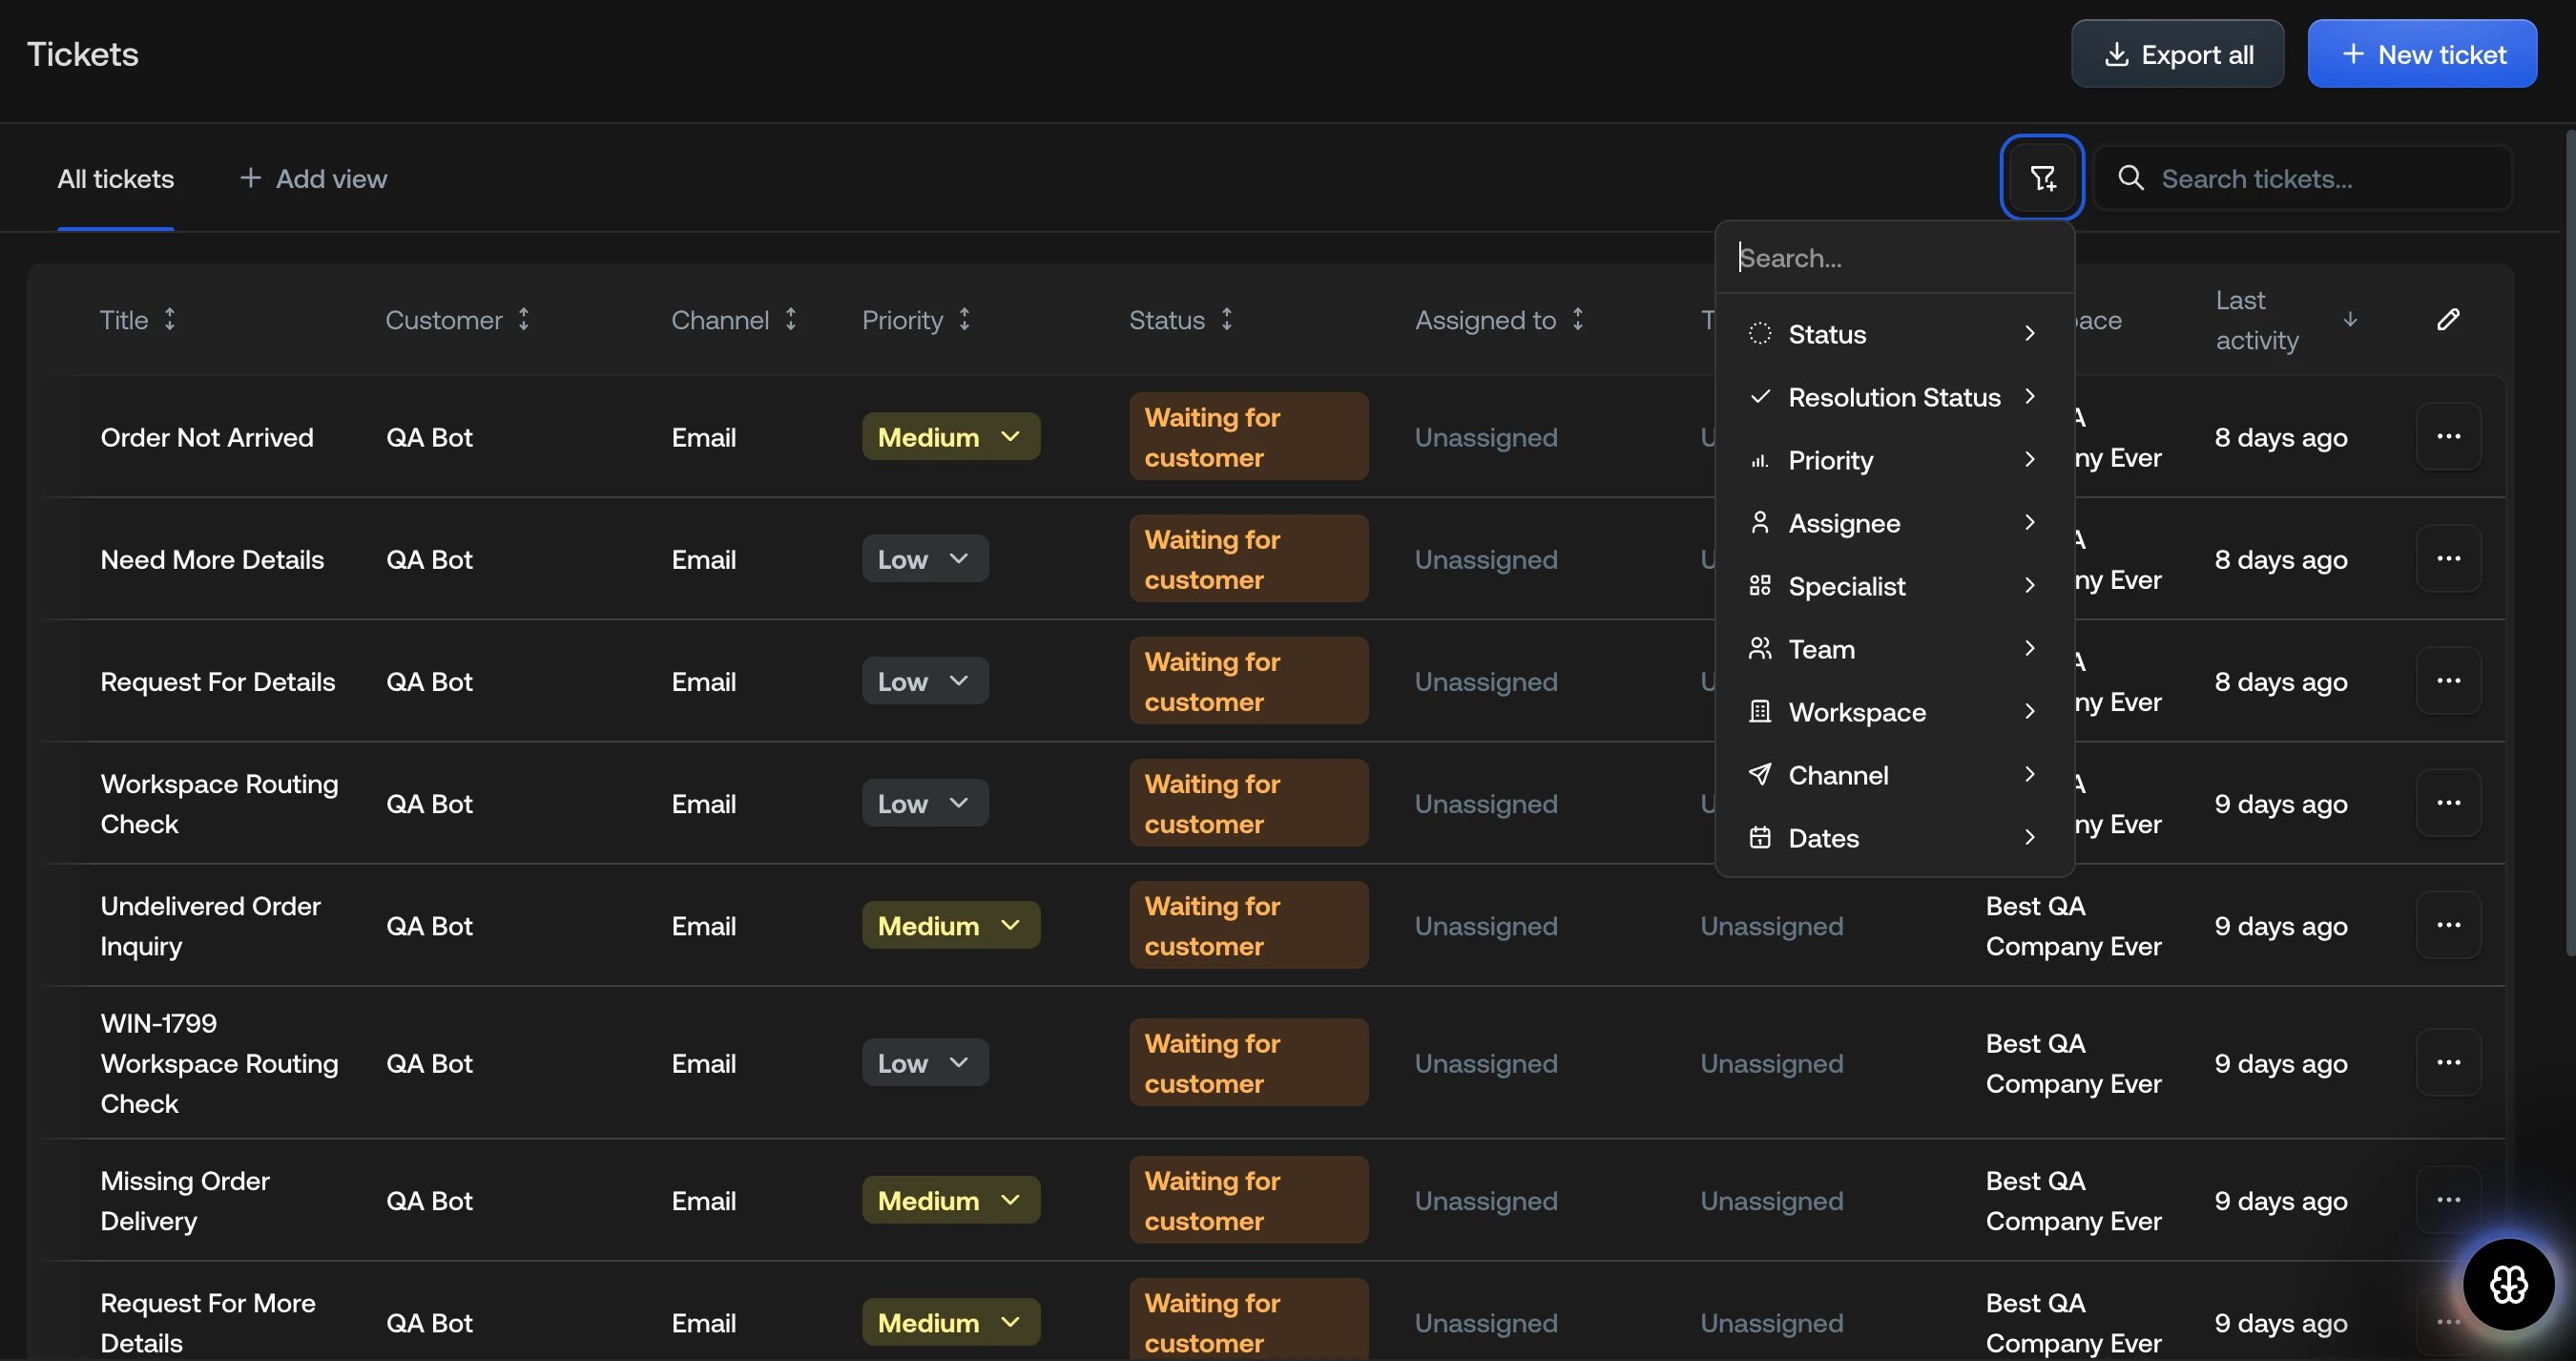
 ### Available filter fields
You can filter tickets by the following fields:
| Field | Description |
| --------------------- | ------------------------------------------------------------------------------- |
| **Status** | The current status of the ticket (e.g., done, processing) |
| **Resolution status** | Whether the ticket has been resolved and how |
| **Assignee** | The Human Agent assigned to the ticket |
| **Team** | The team responsible for the ticket |
| **Channel** | The communication channel (e.g., email, chat) |
| **Rating** | Agent/admin conversation rating: Unrated, or 1–5 stars |
| **Workspace** | The workspace the ticket belongs to (only shown when multiple workspaces exist) |
Use **Rating = Unrated** together with AI-handled filters to find
conversations that still need a quality review. See
[Conversation rating](/documentation/tickets/conversation-rating).
### Available filter fields
You can filter tickets by the following fields:
| Field | Description |
| --------------------- | ------------------------------------------------------------------------------- |
| **Status** | The current status of the ticket (e.g., done, processing) |
| **Resolution status** | Whether the ticket has been resolved and how |
| **Assignee** | The Human Agent assigned to the ticket |
| **Team** | The team responsible for the ticket |
| **Channel** | The communication channel (e.g., email, chat) |
| **Rating** | Agent/admin conversation rating: Unrated, or 1–5 stars |
| **Workspace** | The workspace the ticket belongs to (only shown when multiple workspaces exist) |
Use **Rating = Unrated** together with AI-handled filters to find
conversations that still need a quality review. See
[Conversation rating](/documentation/tickets/conversation-rating).
 ### Inverting filters
Each filter can be inverted to exclude specific values instead of including
them. When you add a filter, you can toggle the filter to **is not** mode, which
will show all tickets where the field does **not** match the selected values.
Use inverted filters when you want to exclude a small number of values. For
example, filter where status **is not** "done" to see all active tickets.
### Combining multiple filters
You can add multiple filters to refine your search. All filters are combined
using **AND** logic, meaning tickets must match **all** active filters to appear
in the results.
### Inverting filters
Each filter can be inverted to exclude specific values instead of including
them. When you add a filter, you can toggle the filter to **is not** mode, which
will show all tickets where the field does **not** match the selected values.
Use inverted filters when you want to exclude a small number of values. For
example, filter where status **is not** "done" to see all active tickets.
### Combining multiple filters
You can add multiple filters to refine your search. All filters are combined
using **AND** logic, meaning tickets must match **all** active filters to appear
in the results.
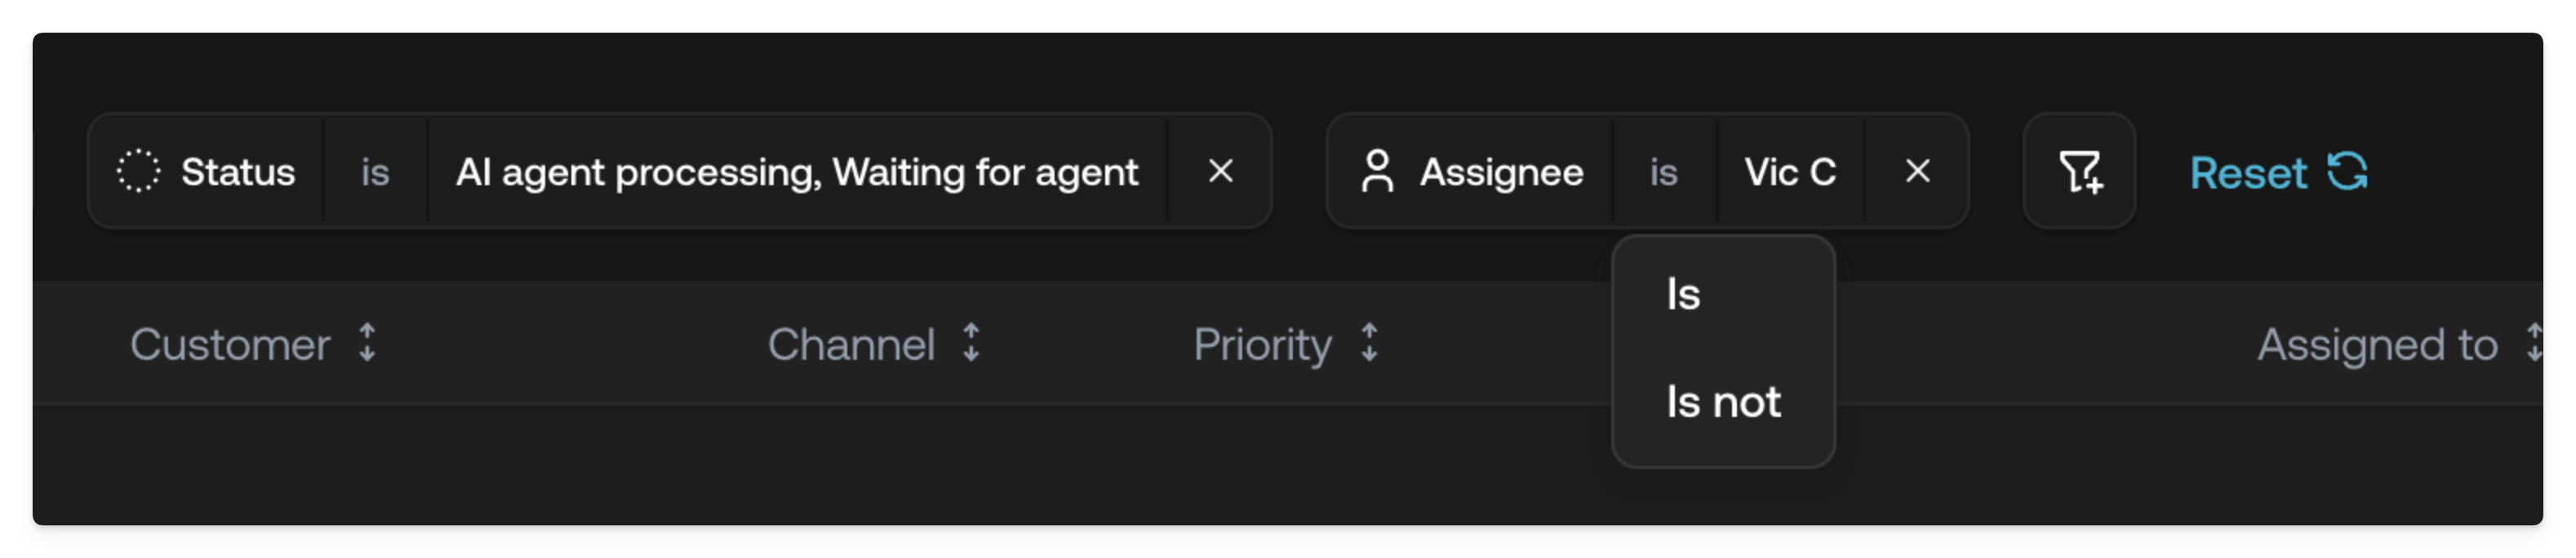 **Example:** If you add a filter for `Status = processing` **and** `Team =
Support`, only tickets that are both in processing status **and** assigned to
the Support team will be shown.
### Removing filters
To remove a filter, click the **×** button next to the filter tag. To clear all
filters at once, click **Clear filters**.
***
## Column visibility
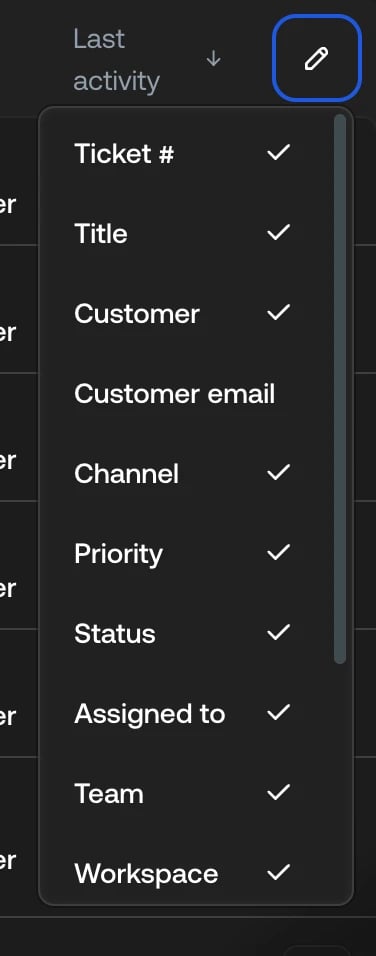
You can customize which columns are displayed in the ticket list using the
**column menu** — the **pencil** icon at the top-right of the table (labelled
*Adjust columns and sorting*). This allows you to show only the information
that's relevant to your workflow.
**Example:** If you add a filter for `Status = processing` **and** `Team =
Support`, only tickets that are both in processing status **and** assigned to
the Support team will be shown.
### Removing filters
To remove a filter, click the **×** button next to the filter tag. To clear all
filters at once, click **Clear filters**.
***
## Column visibility
You can customize which columns are displayed in the ticket list using the
**column menu** — the **pencil** icon at the top-right of the table (labelled
*Adjust columns and sorting*). This allows you to show only the information
that's relevant to your workflow.
 ### Managing columns
Click the **pencil** icon at the top-right of the table.
Check or uncheck the columns you want to show or hide. Changes are applied
immediately.
### Default columns
The following columns are visible by default:
* Ticket #
* Title
* Customer
* Channel
* Priority
* Status
* Assigned to
* Team
* Last activity
### Additional columns
These columns are hidden by default but can be enabled:
* Resolution status
* Created
* Customer email
* Rating
* Workspace (only available when multiple workspaces exist)
Enable the **Customer email** column when you need to quickly identify or copy
customer contact information without opening individual tickets.
### Reordering columns
You can change the order of the columns by dragging them directly in the table.
Hover over a column header to reveal its **drag handle** (the grip icon), then
drag the column left or right to reposition it. The new order is applied
immediately.
Every data column can be reordered. Column order, like column visibility, is
remembered per [saved view](/documentation/tickets/saved-views).
***
## Saving a view
Once you've set up filters, columns, and sorting the way you like, you can save
that combination as a reusable tab so you don't have to rebuild it each time.
See [Saved views](/documentation/tickets/saved-views) for details.
### Managing columns
Click the **pencil** icon at the top-right of the table.
Check or uncheck the columns you want to show or hide. Changes are applied
immediately.
### Default columns
The following columns are visible by default:
* Ticket #
* Title
* Customer
* Channel
* Priority
* Status
* Assigned to
* Team
* Last activity
### Additional columns
These columns are hidden by default but can be enabled:
* Resolution status
* Created
* Customer email
* Rating
* Workspace (only available when multiple workspaces exist)
Enable the **Customer email** column when you need to quickly identify or copy
customer contact information without opening individual tickets.
### Reordering columns
You can change the order of the columns by dragging them directly in the table.
Hover over a column header to reveal its **drag handle** (the grip icon), then
drag the column left or right to reposition it. The new order is applied
immediately.
Every data column can be reordered. Column order, like column visibility, is
remembered per [saved view](/documentation/tickets/saved-views).
***
## Saving a view
Once you've set up filters, columns, and sorting the way you like, you can save
that combination as a reusable tab so you don't have to rebuild it each time.
See [Saved views](/documentation/tickets/saved-views) for details.