> ## Documentation Index
> Fetch the complete documentation index at: https://docs.typewise.app/llms.txt
> Use this file to discover all available pages before exploring further.
# Start a conversation
> Contact customers proactively by creating a new email ticket
Contact customers proactively. Create a ticket, compose your message, and send
it without waiting for the customer to reach out first.
***
## How to start a conversation
Navigate to **All tickets** and click **New Ticket** in the page header.
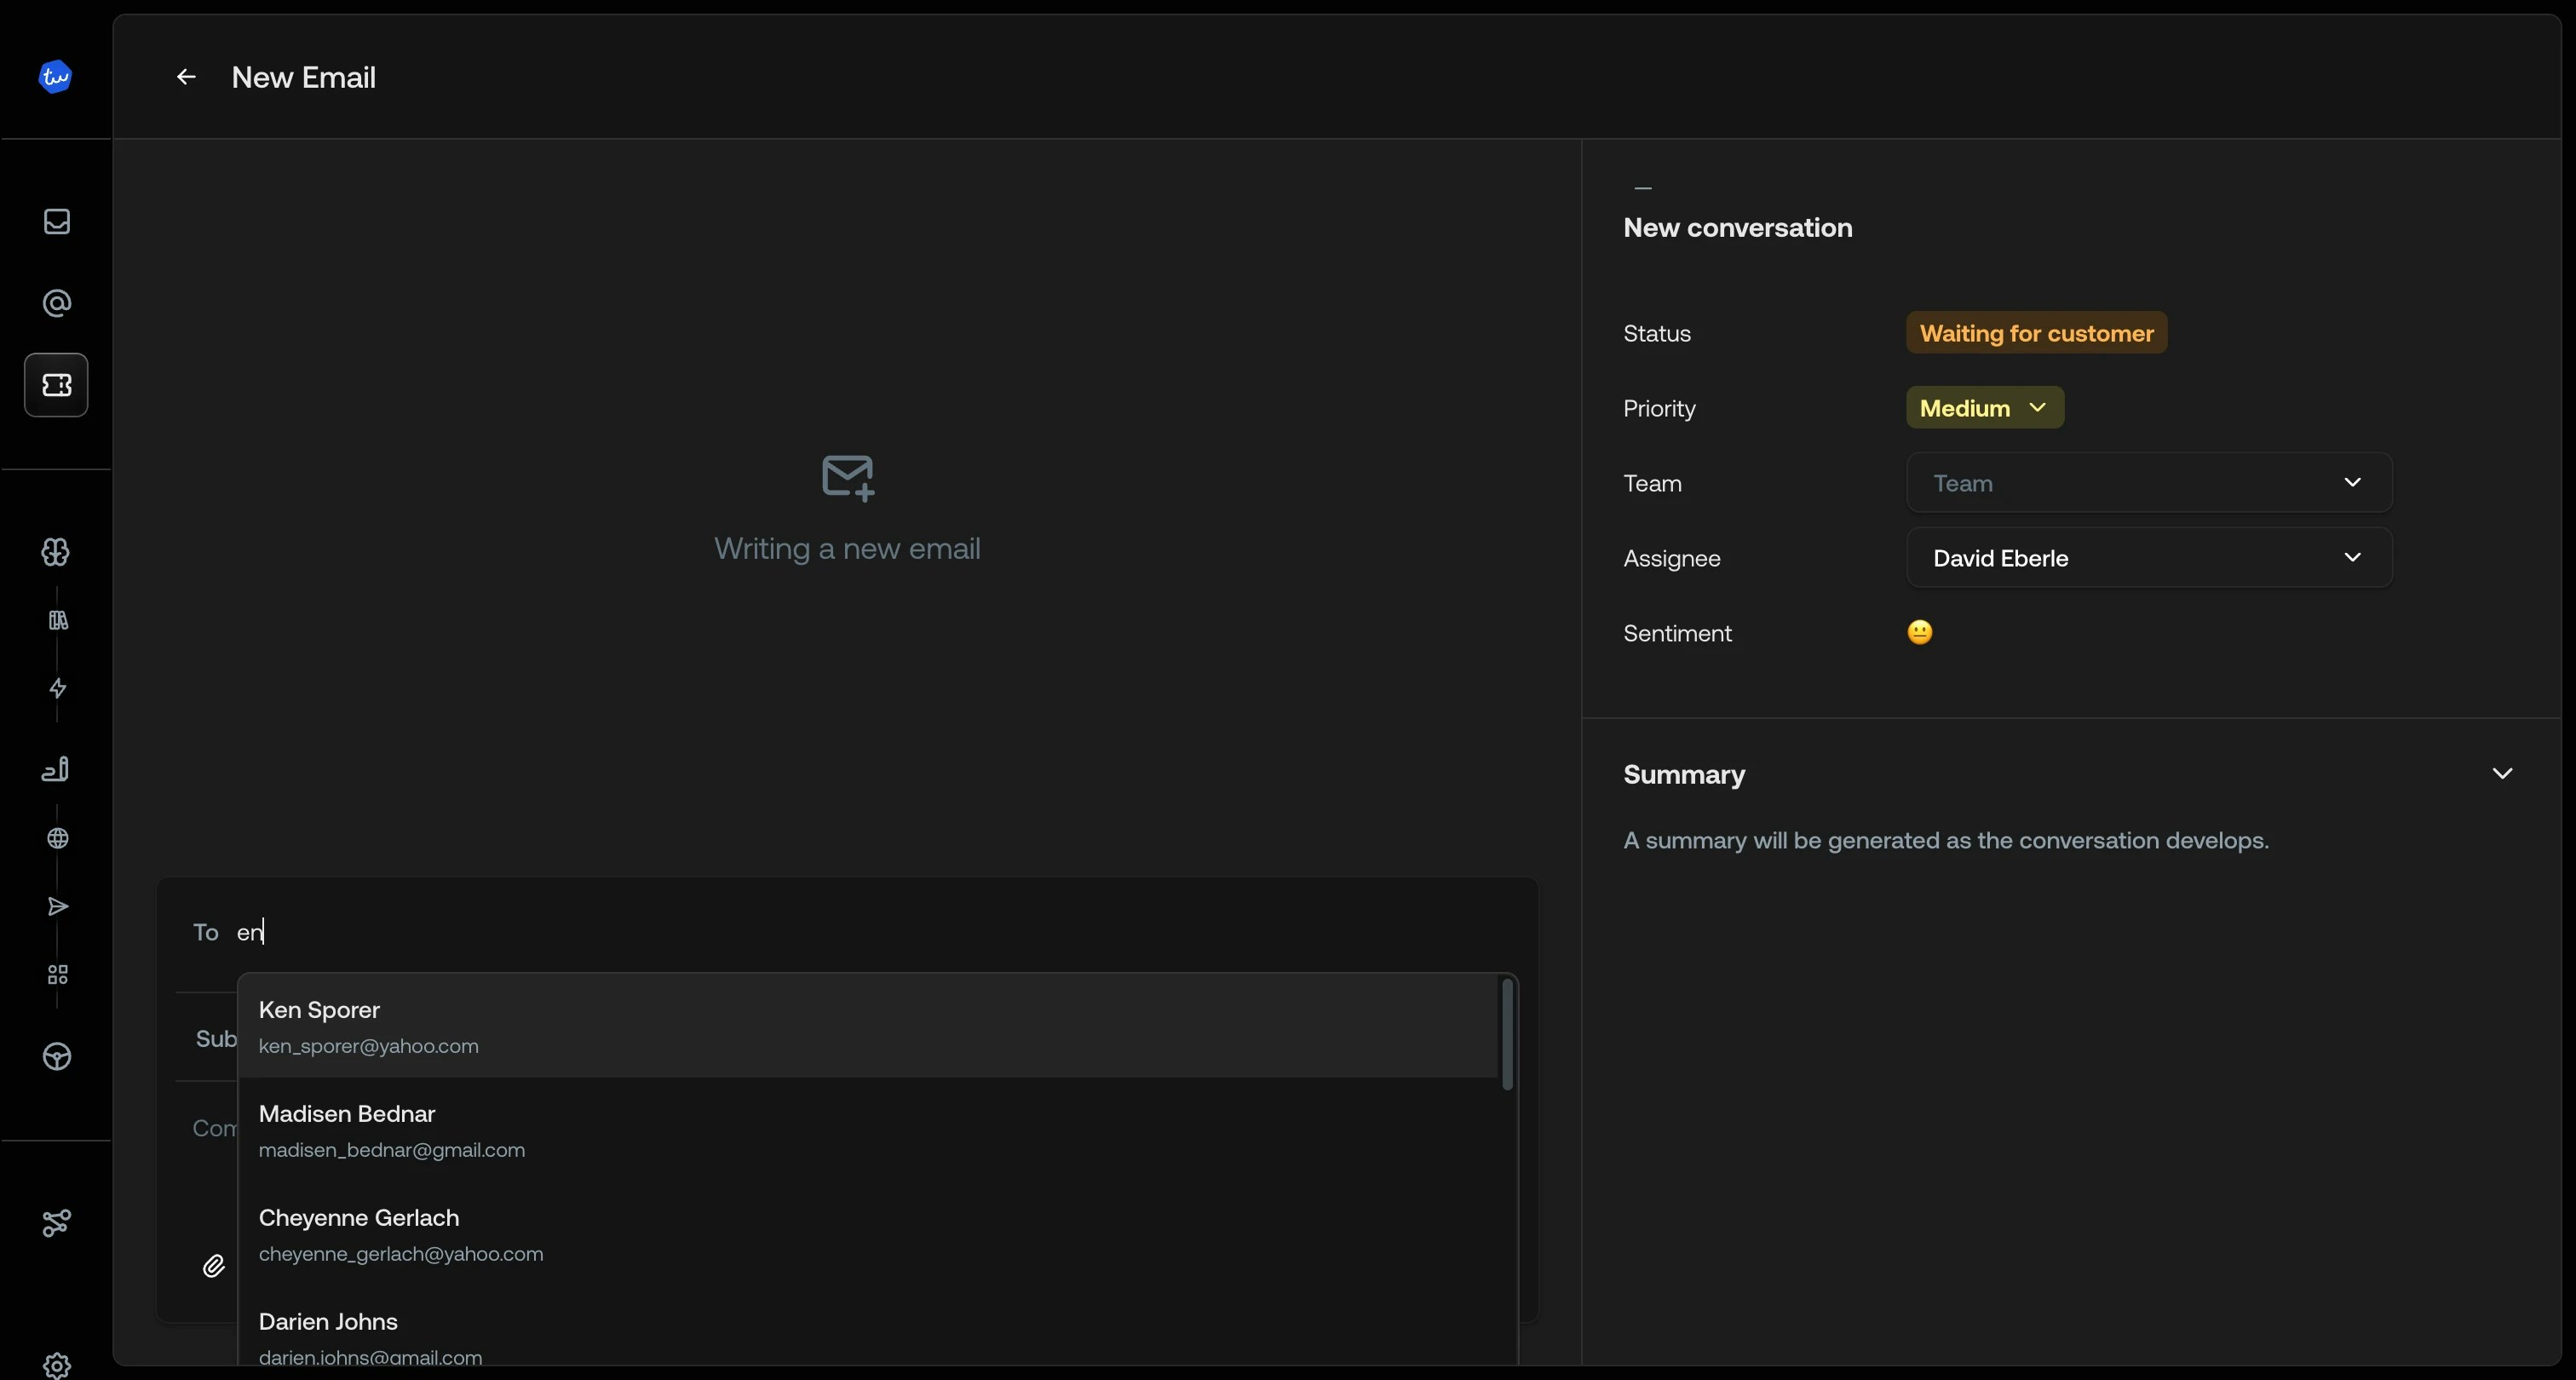
Start typing a name or email address in the **To** field. A dropdown shows matching customers from your records. Select one to add them as the recipient.
If the customer doesn't exist yet, type their full email address and press **Enter**. A new customer record is created automatically.
 Type a subject line for your email.
Write your message using the rich text editor. Bold, italic, lists, links, and block quotes are all supported, same as the regular [composer](/documentation/tickets/conversation-view/composer).
Type a subject line for your email.
Write your message using the rich text editor. Bold, italic, lists, links, and block quotes are all supported, same as the regular [composer](/documentation/tickets/conversation-view/composer).
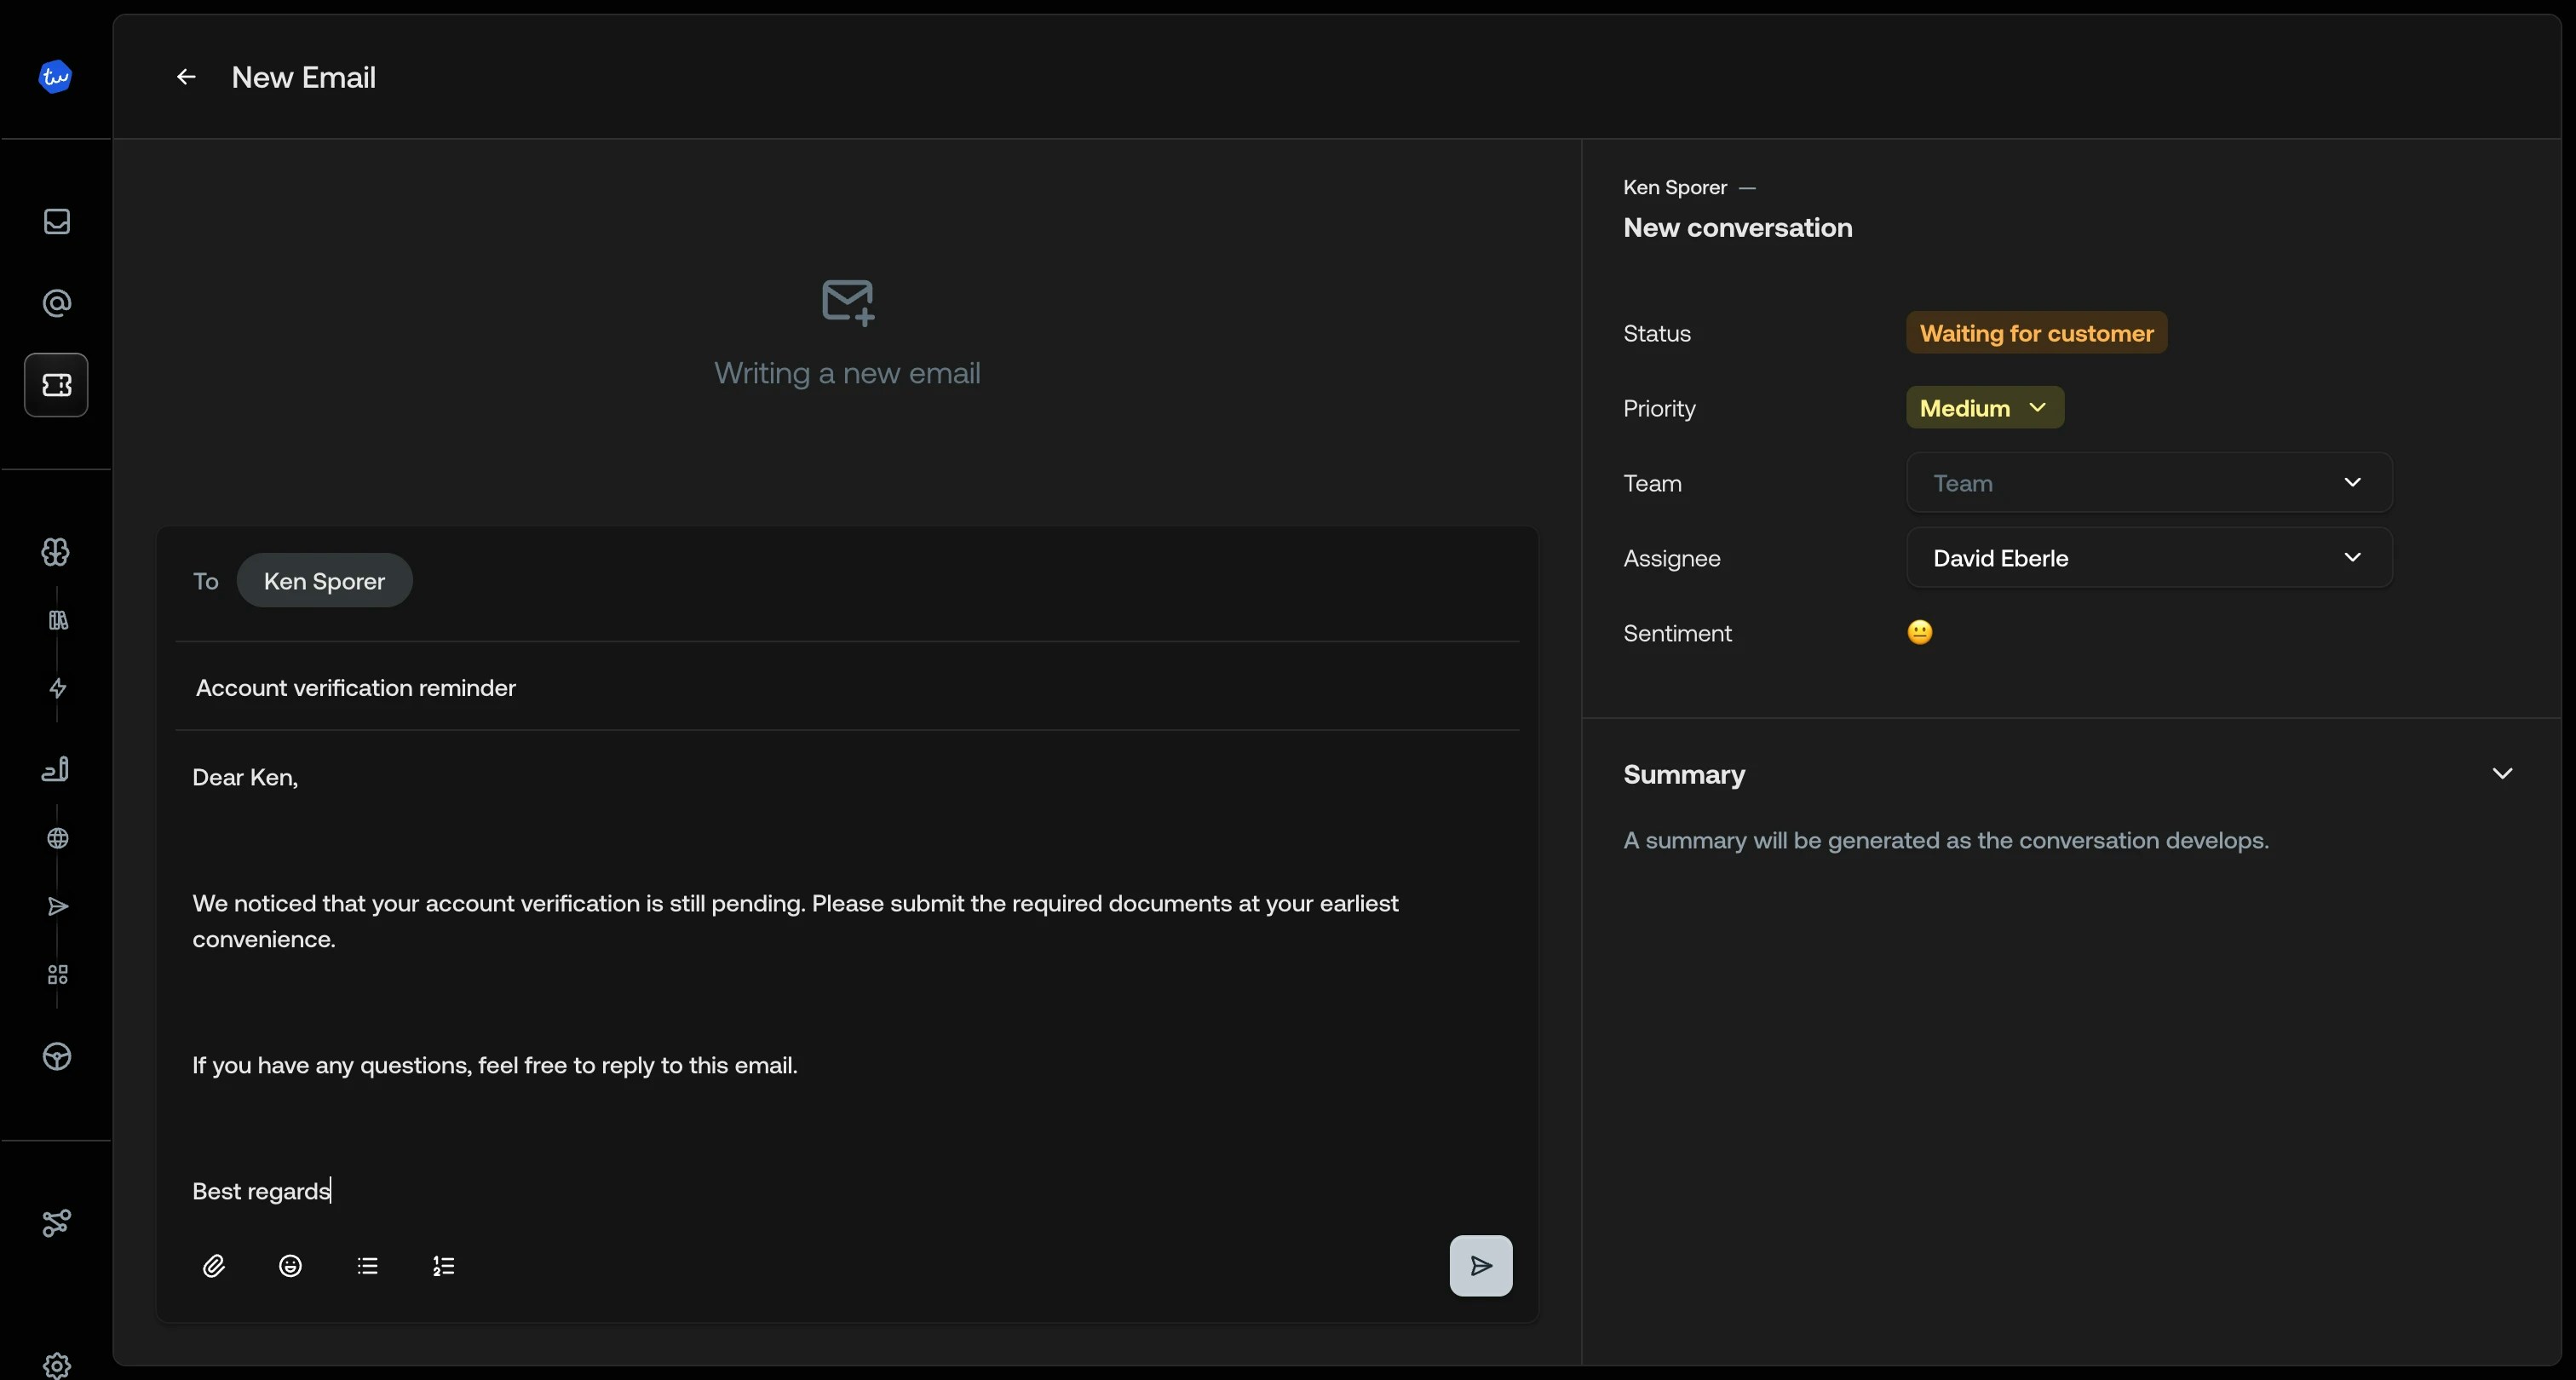 Click the attachment icon to attach files. Attached files appear below the editor.
Use the right-hand panel to set the **Assignee**, **Team**, and **Priority**.
Click **Send**. You're taken to the newly created ticket.
Your email signature is added automatically.
***
## After sending
A ticket is created with the status **Waiting for customer** and stays assigned
to a human agent. The AI won't take over.
When the customer replies, the response appears on the same ticket and it
reopens in your inbox as a normal conversation.
To set a follow-up reminder,
[snooze the ticket](/documentation/tickets/snooze-tickets). It reappears when
the snooze period ends or the customer replies, whichever comes first.
***
## One-way notifications
If you don't expect a reply (for example, a policy update or an informational
notice), start the conversation as described above, then close the ticket
manually once you're taken to it. Mention in the email body that no response is
needed, so the customer knows not to reply.
If the customer does reply, the ticket reopens automatically.
***
## See also
* [Composer](/documentation/tickets/conversation-view/composer): Rich text
editing and message options
* [Snooze tickets](/documentation/tickets/snooze-tickets): Set follow-up
reminders
* [All tickets](/documentation/tickets/all-tickets): Browse and search all
tickets
Click the attachment icon to attach files. Attached files appear below the editor.
Use the right-hand panel to set the **Assignee**, **Team**, and **Priority**.
Click **Send**. You're taken to the newly created ticket.
Your email signature is added automatically.
***
## After sending
A ticket is created with the status **Waiting for customer** and stays assigned
to a human agent. The AI won't take over.
When the customer replies, the response appears on the same ticket and it
reopens in your inbox as a normal conversation.
To set a follow-up reminder,
[snooze the ticket](/documentation/tickets/snooze-tickets). It reappears when
the snooze period ends or the customer replies, whichever comes first.
***
## One-way notifications
If you don't expect a reply (for example, a policy update or an informational
notice), start the conversation as described above, then close the ticket
manually once you're taken to it. Mention in the email body that no response is
needed, so the customer knows not to reply.
If the customer does reply, the ticket reopens automatically.
***
## See also
* [Composer](/documentation/tickets/conversation-view/composer): Rich text
editing and message options
* [Snooze tickets](/documentation/tickets/snooze-tickets): Set follow-up
reminders
* [All tickets](/documentation/tickets/all-tickets): Browse and search all
tickets