Setting up email for the first time? Start with Set up
email.
Prerequisites
- Access to your email provider and DNS manager
- Permission to add forwarding rules and update DNS records
- A test cohort (internal addresses or sub-alias) for validation
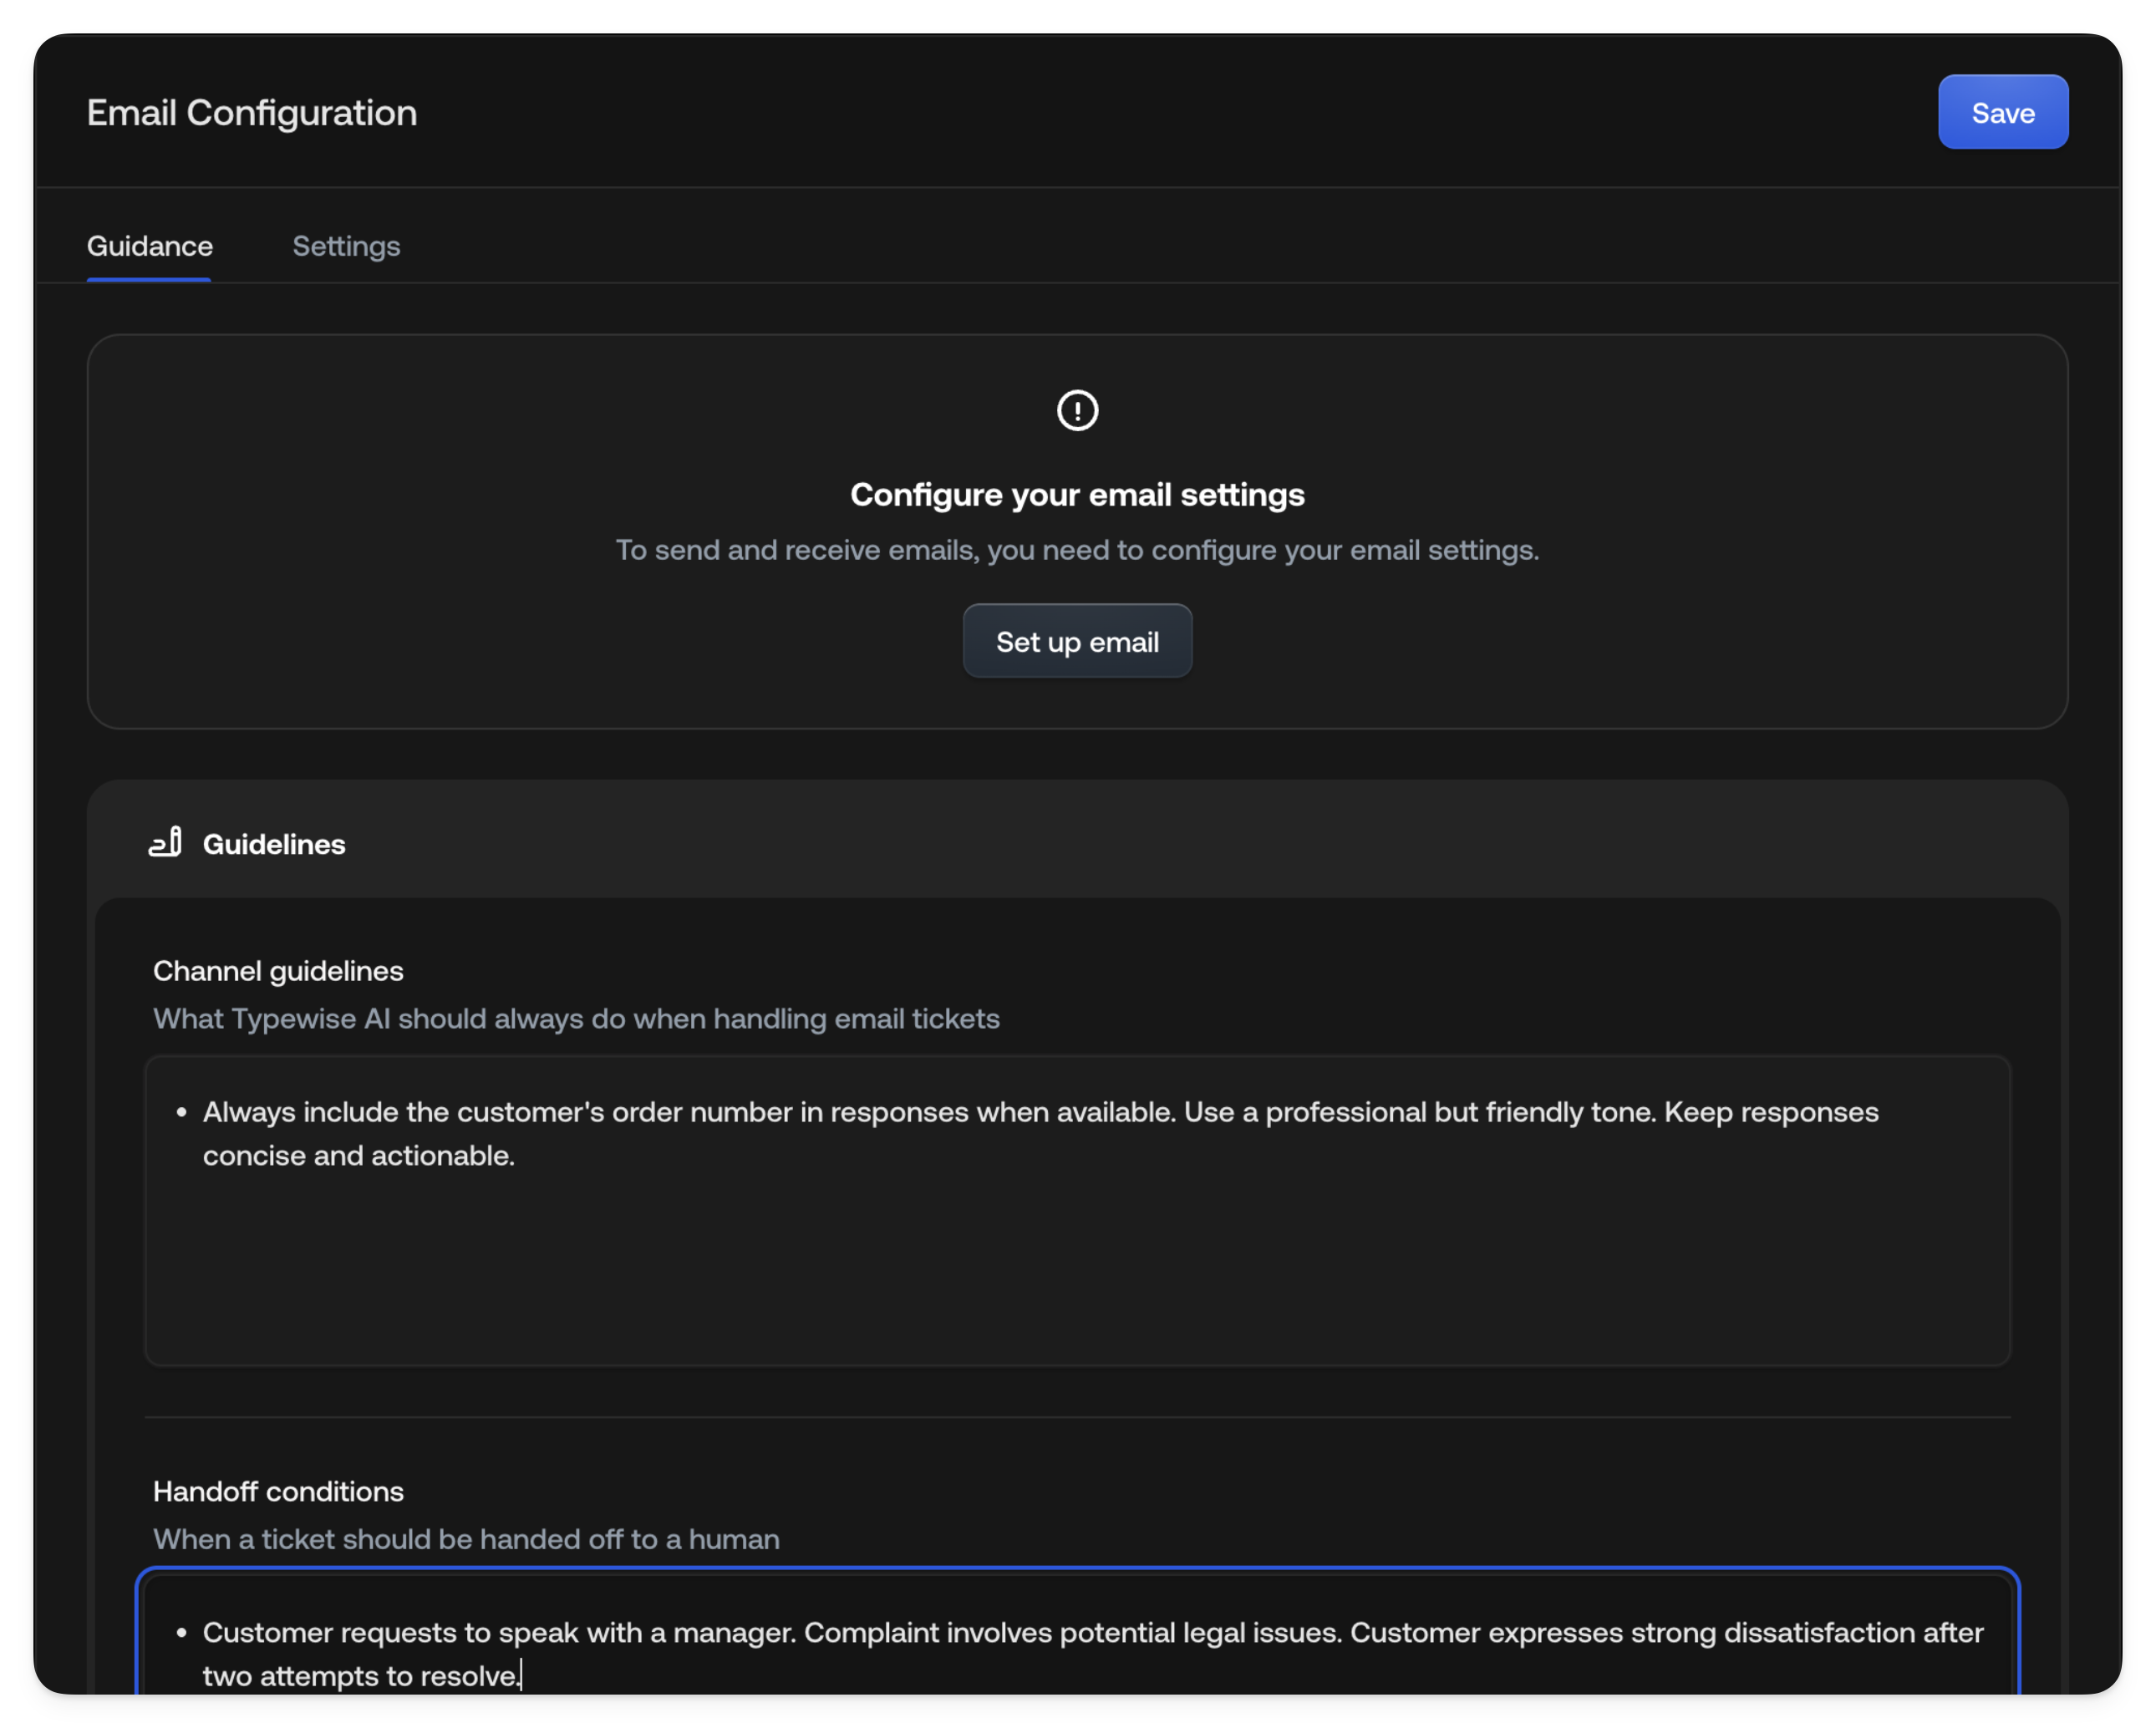
Step 1: Connect the support inbox
- Go to Email Channel (Behavior → Channels → Email)
- Follow the setup wizard to add your support email
- Add required DNS records
- Wait for verification (Ready status)
Step 2: Set up safe forwarding
Route only test traffic to Typewise while keeping your existing inbox operational. Option A: Alias-based routing (recommended) Create a test alias (e.g.,support+tw@yourcompany.com) and forward only that
alias. Test without affecting production.
Option B: Percentage-based routing
If supported, forward 5-10% of traffic to Typewise.
Option C: Internal-only testing
Forward only emails from internal addresses.
Expected outcome: Test emails arrive in Typewise; production continues to
existing inbox.
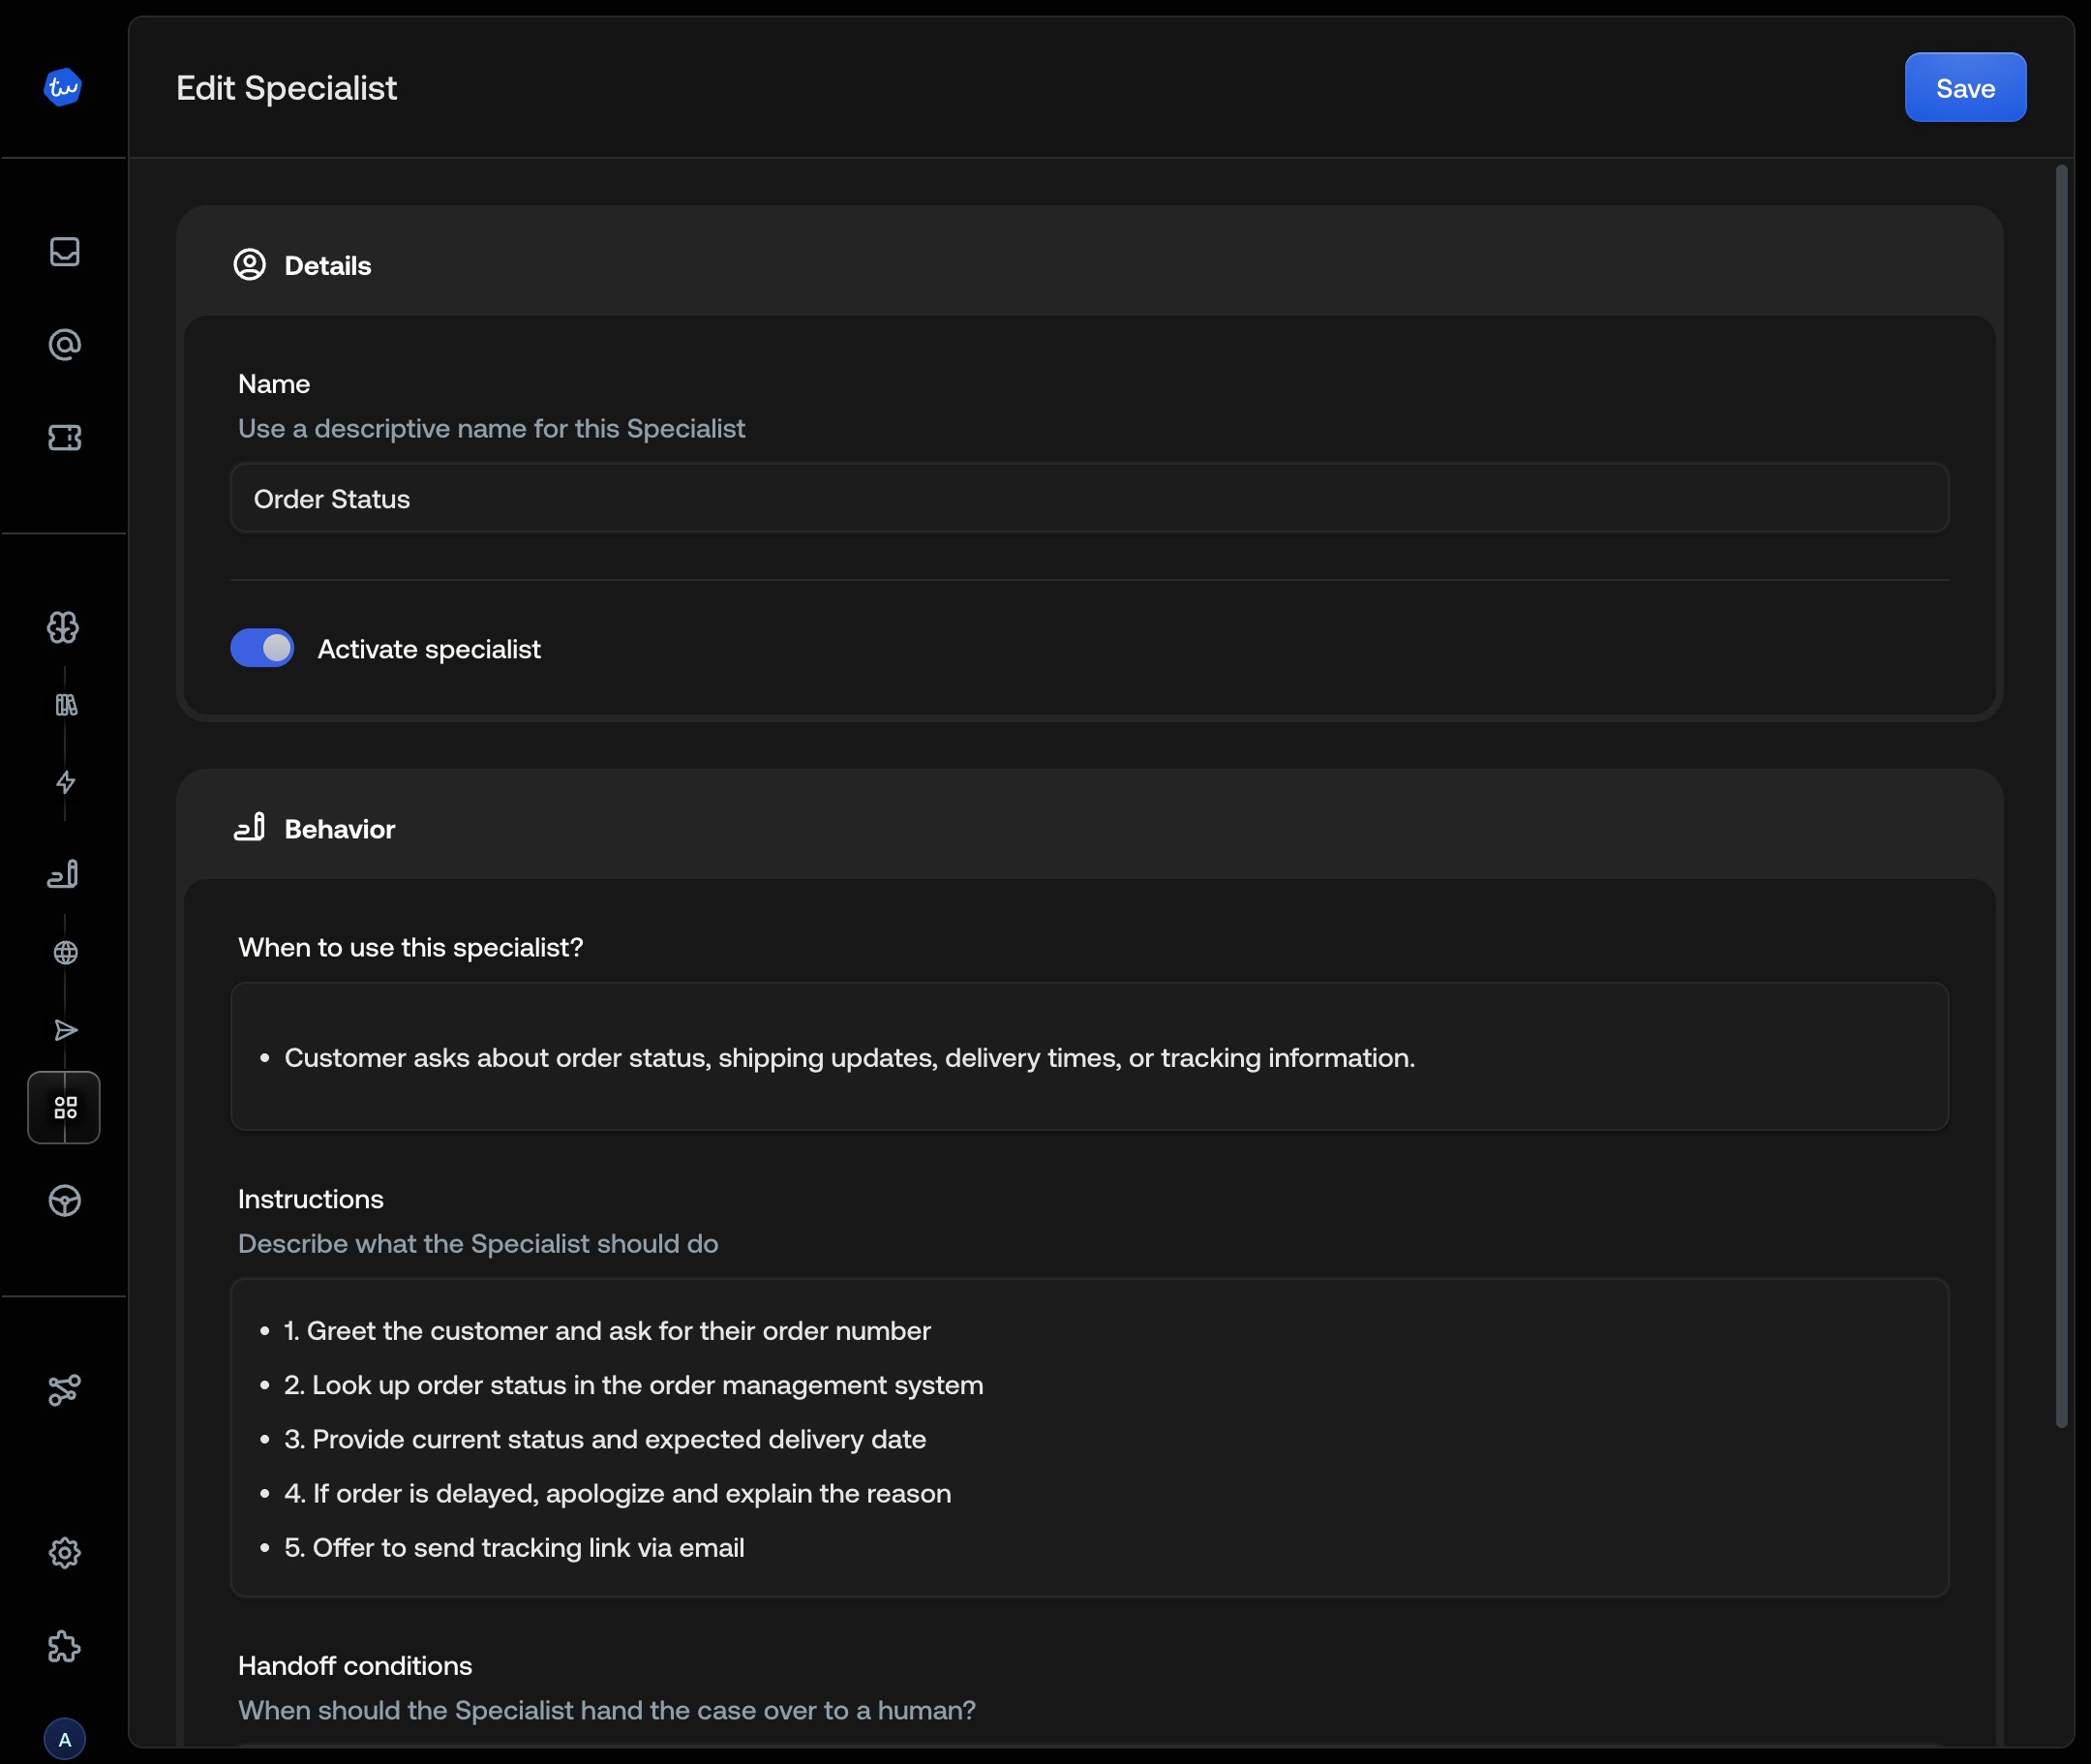
Step 3: Create one Specialist
Choose your highest-volume question category.- Go to Specialists (sidebar → Specialists)
- Click + Create Specialist
- Configure:
- Name: e.g., “Order Status Inquiries”
- When to use: “Customer asks about order status, shipping, or delivery”
- Instructions: Steps for handling the request
- Add handoff triggers for edge cases
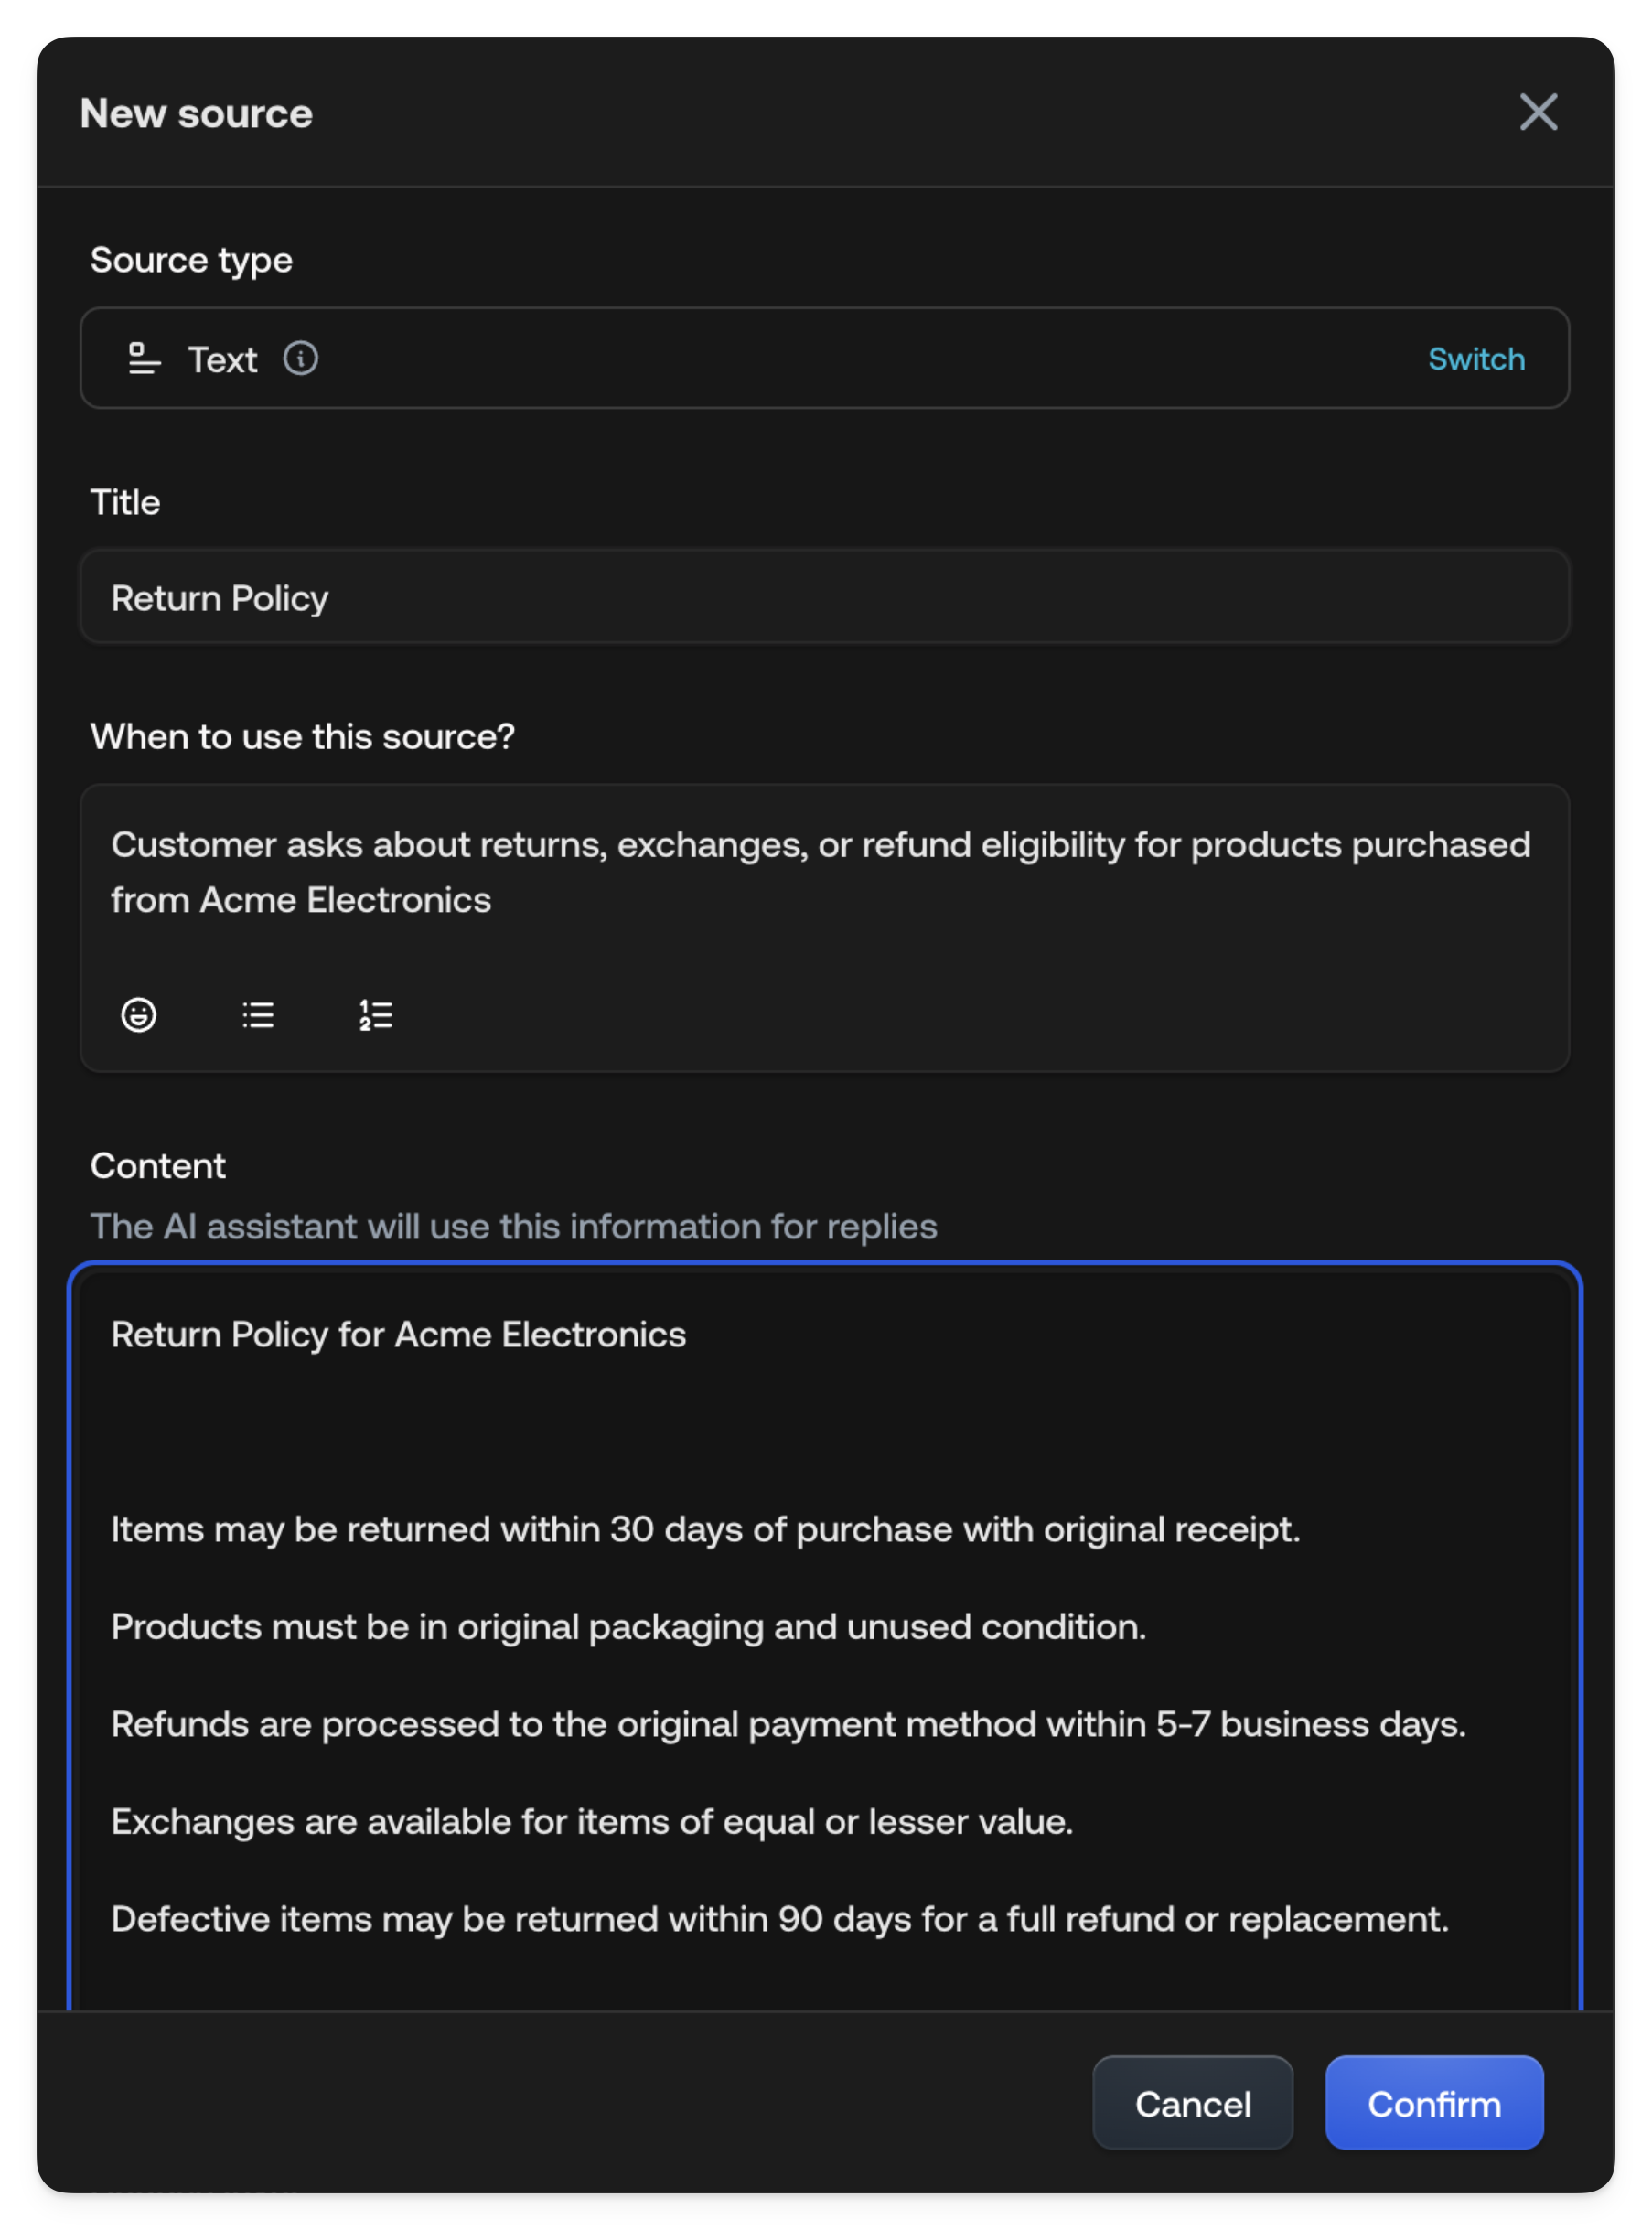
Step 4: Add minimal knowledge
Add one FAQ or help document.- Go to Knowledge Hub (sidebar → Knowledge)
- Click Add source
- Add your FAQ page or authoritative document
- Wait for processing
Step 5: Test in the Simulator
Test before going live.- Go to Simulator (sidebar → Simulator)
- Click + New Conversation
- Select your Specialist and Email channel
- Type realistic customer messages
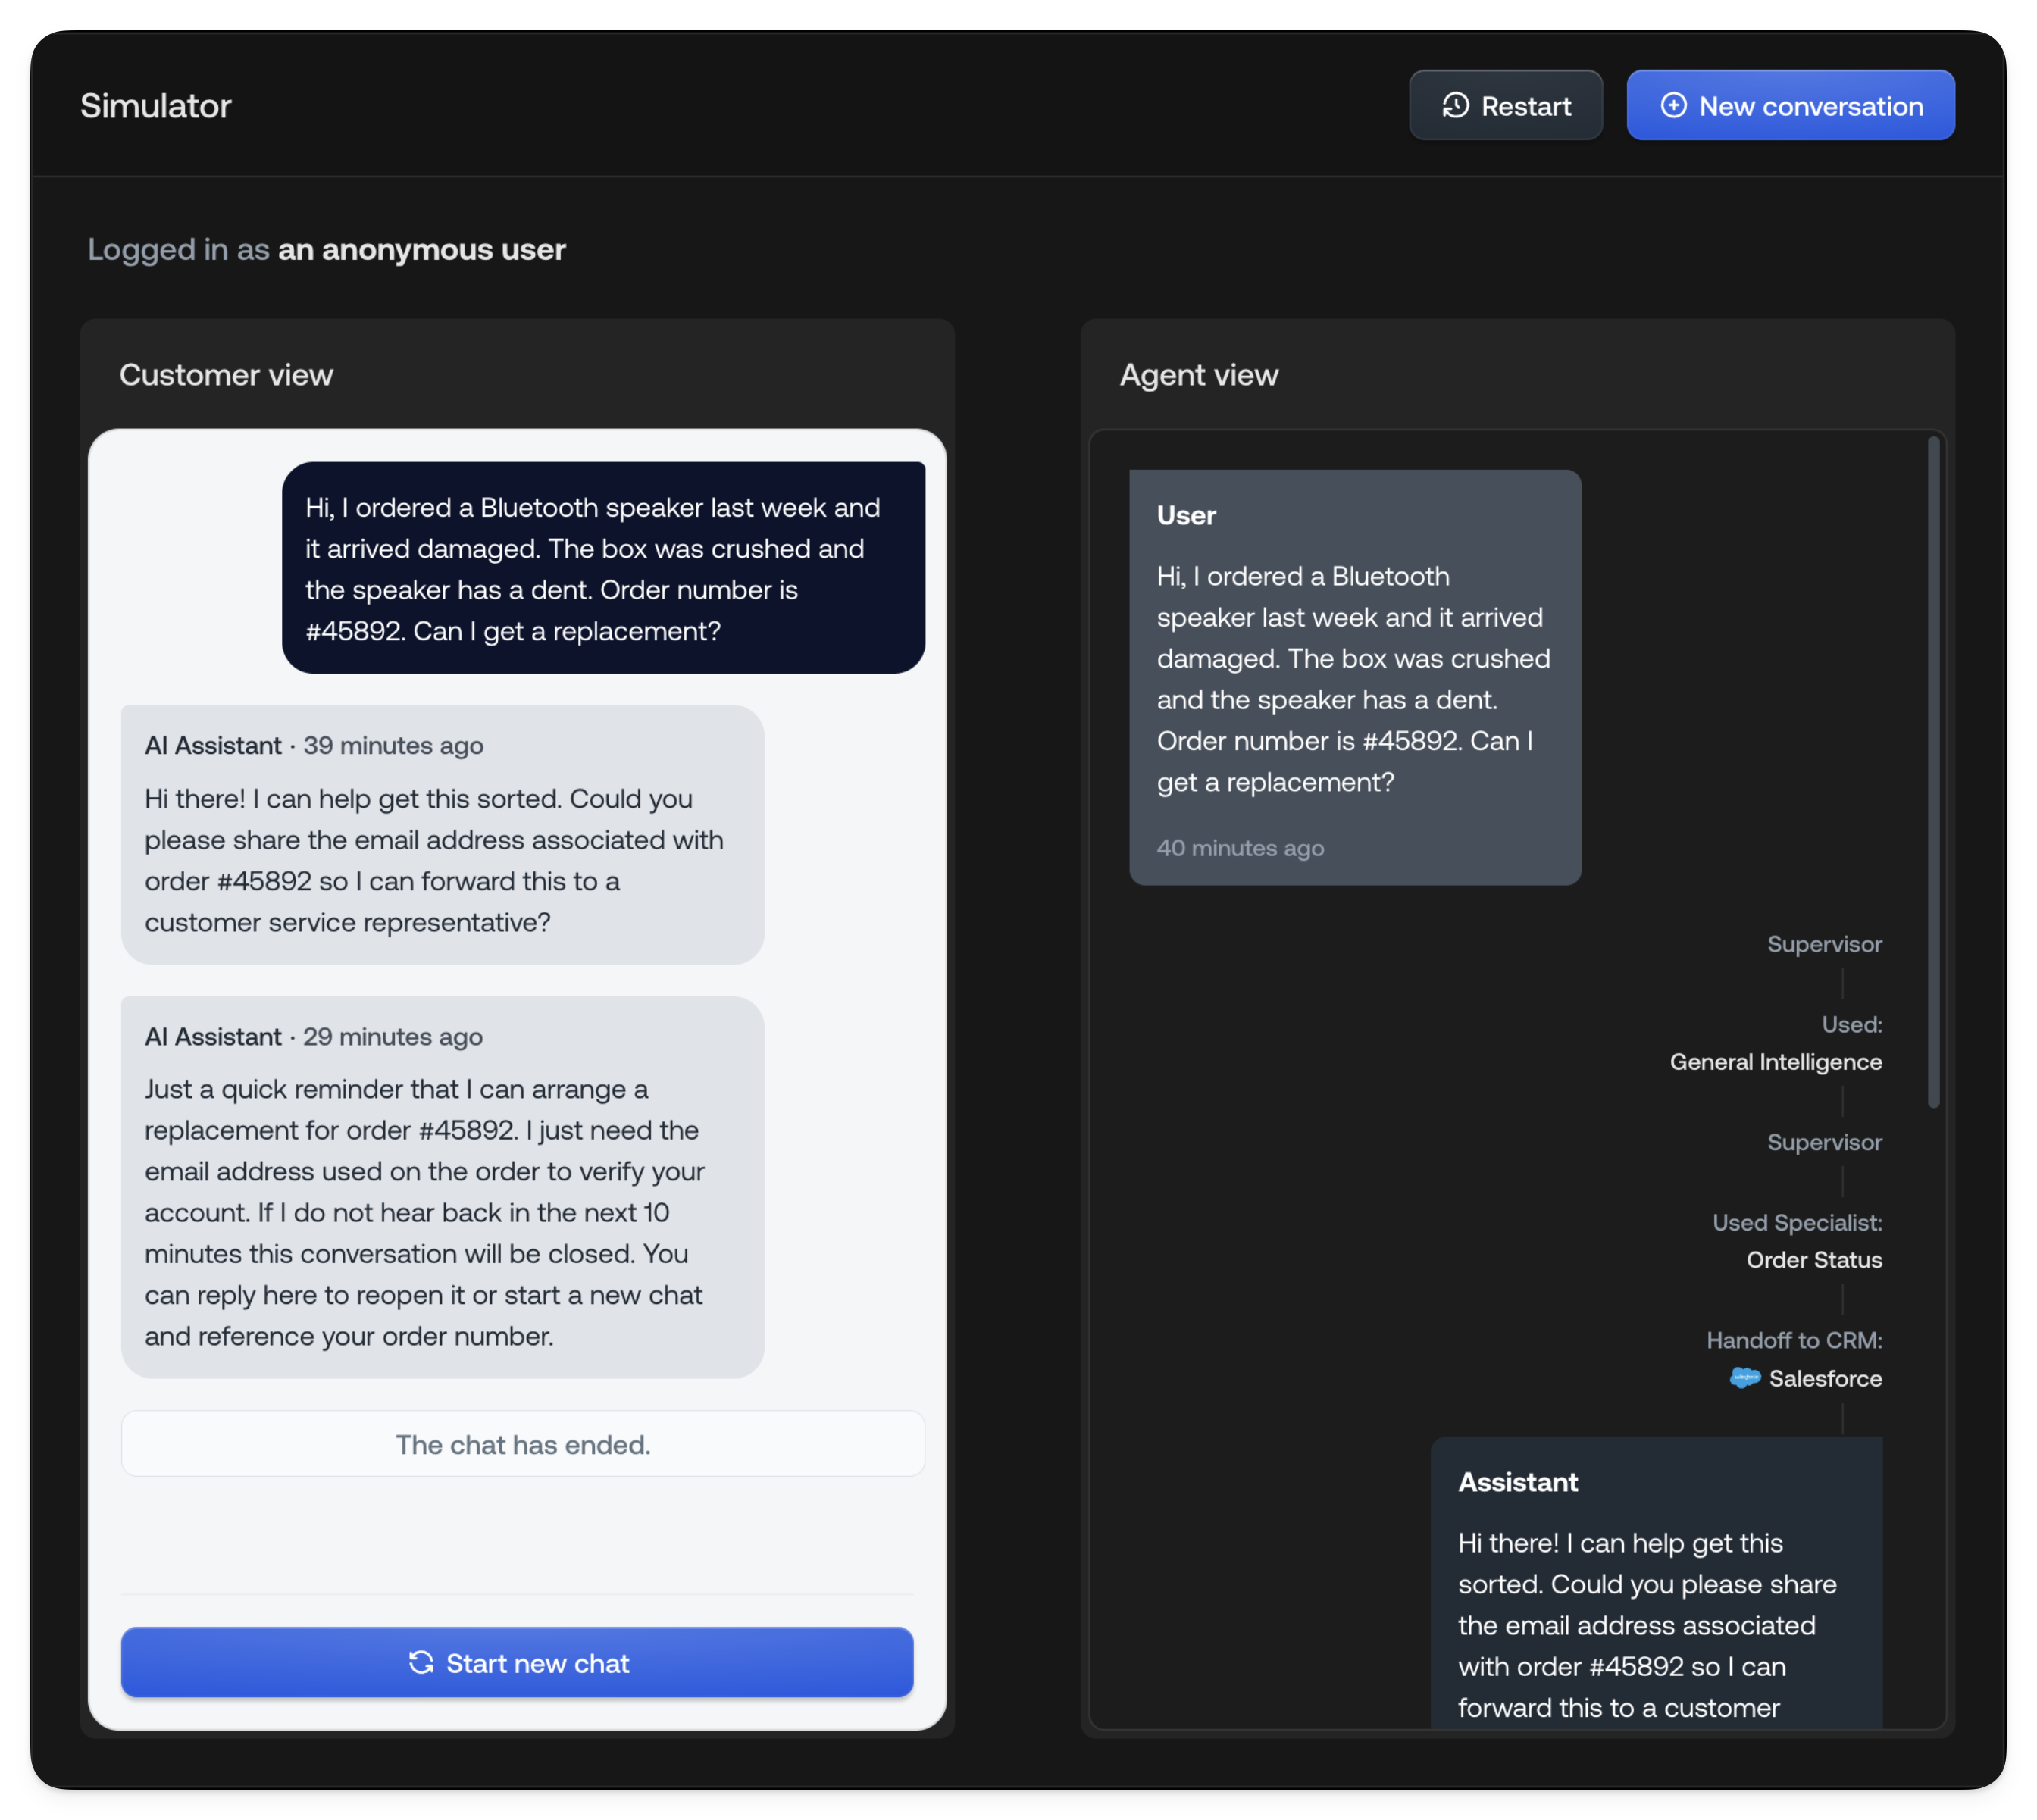
- Straightforward question the Specialist should handle
- Edge case that should trigger handoff
- Question requiring knowledge lookup
- Does it cite correct knowledge sources?
- Does it hand off when appropriate?
- Are responses accurate?
Step 6: Configure handoff triggers
Route sensitive cases to Human Agents.- In Specialist instructions, define handoff conditions
- Common triggers:
- Refund or cancellation requests
- Complaints or escalations
- Questions outside scope
- Customer requests Human Agent
Step 7: Roll out gradually
Increase traffic incrementally.| Phase | Traffic | Duration | Success criteria |
|---|---|---|---|
| 1 | 5-10% | 1 week | No major issues |
| 2 | 25% | 1 week | Consistent quality |
| 3 | 50% | 1 week | Team comfortable |
| 4 | 100% | Ongoing | Migration complete |
- Resolution rate (AI vs. handed off)
- Customer satisfaction
- Response accuracy
- Handoff appropriateness
Step 8: Verify deliverability and archiving
Confirm emails deliver and are tracked. Deliverability:- Send test emails, verify arrival (not spam)
- Check SPF/DKIM/DMARC with MXToolbox
- Monitor bounce rates
- Verify tickets in All Tickets with full history
- If connected to CRM, confirm sync
Checklist
- Email channel verified (Ready status)
- Test forwarding working
- One Specialist configured with handoff triggers
- Knowledge source added and processed
- Simulator tests passed
- Gradual rollout plan in place
- Deliverability verified (SPF/DKIM/DMARC)
- Archiving confirmed
Next steps
- Add more Specialists for other categories
- Expand knowledge based on gaps
- Connect Parcel Tracking
- Configure User Management