How actions work
When the AI Agent determines a task needs to be performed, such as refunding an order or updating a ticket, it checks which actions are available in the current Specialist’s instructions. Only actions added to a Specialist are available. This ensures the AI Agent acts within your specified boundaries.Add an action
Open the action hub
Go to Actions (sidebar → Actions) and click Add action.
Choose the action type
Select the type of action:
- AI action: Executed through an integration
-
Manual action: Delegated to a human agent
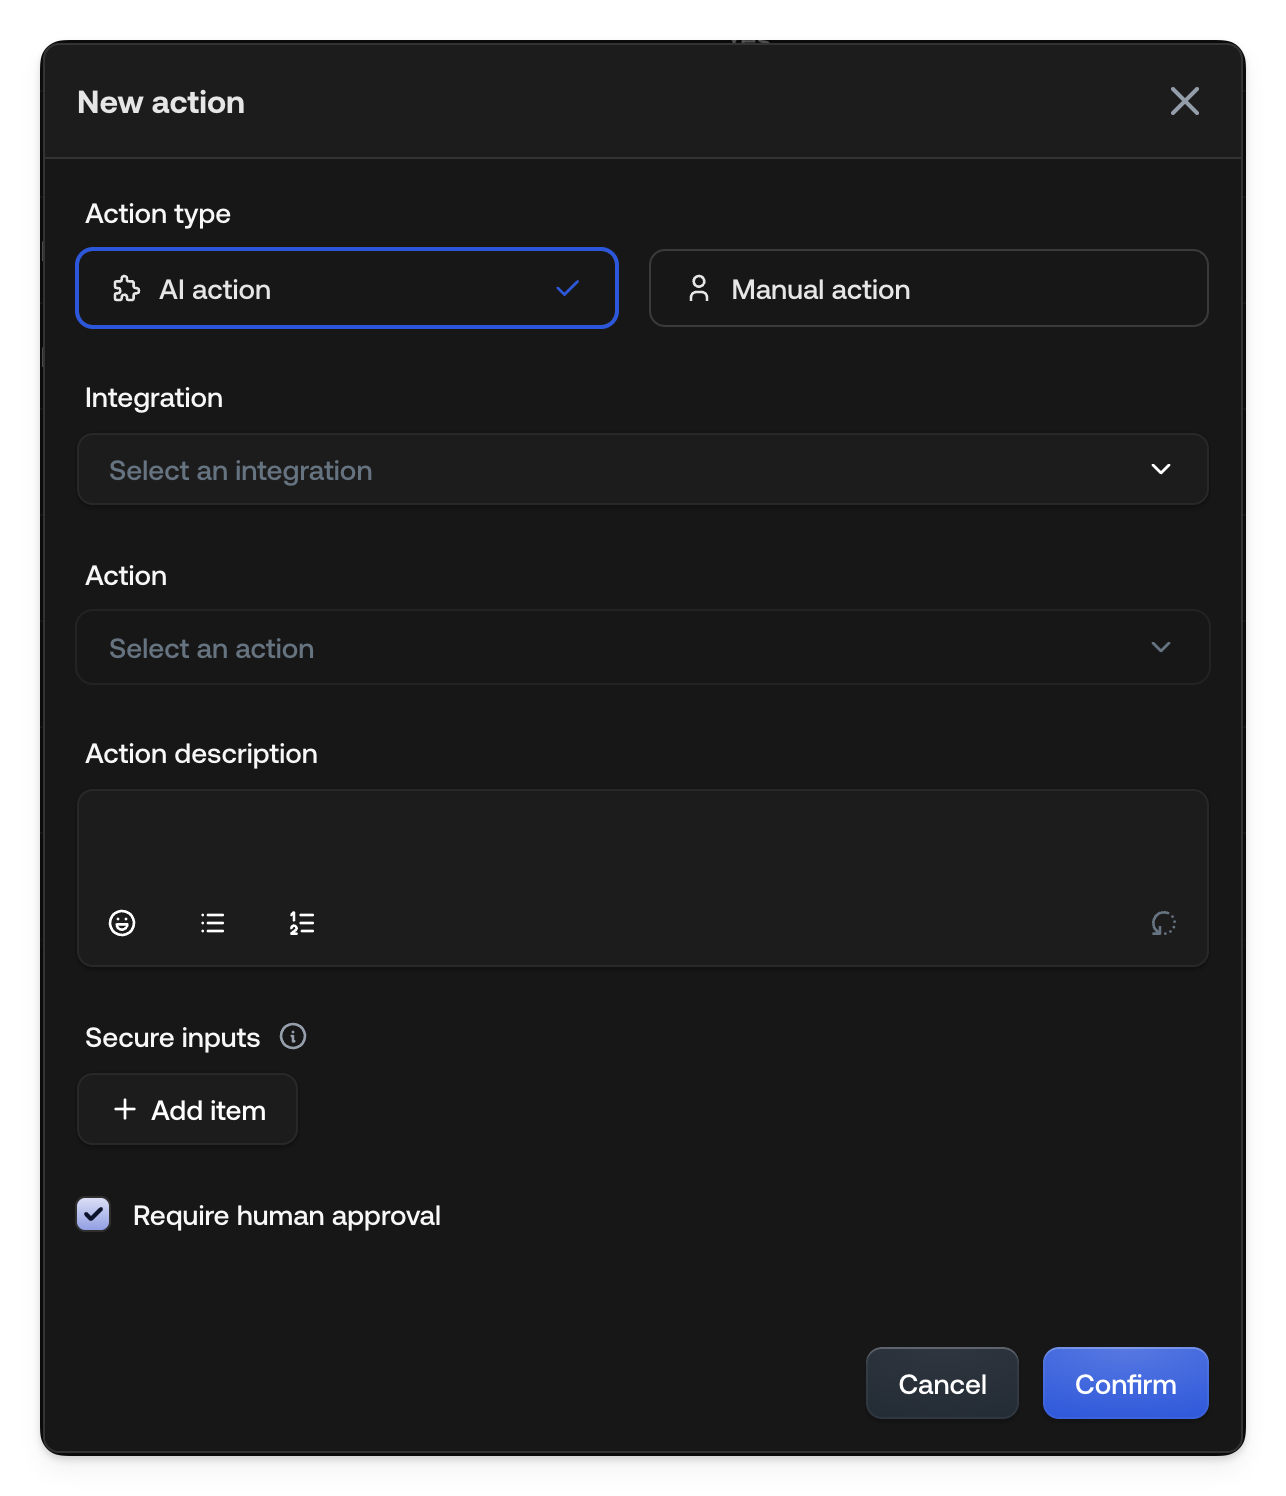
Configure the action
Fill in the required fields:
- Integration: The connected system (e.g., Salesforce, your MCP server)
- Action: The specific operation from the integration
- Action description: When and how to use this action
- Customize inputs: Per input, pick a source (Auto, Static, or a context variable). Add a Trusted only check on variable mappings that need a verified value.
- Require human approval: Require confirmation before execution (enabled by default)
Save and add to Specialist
Click Confirm to save. Then add it to a Specialist:
- Go to Specialists (sidebar → Specialists)
- Edit the Specialist that should use this action
-
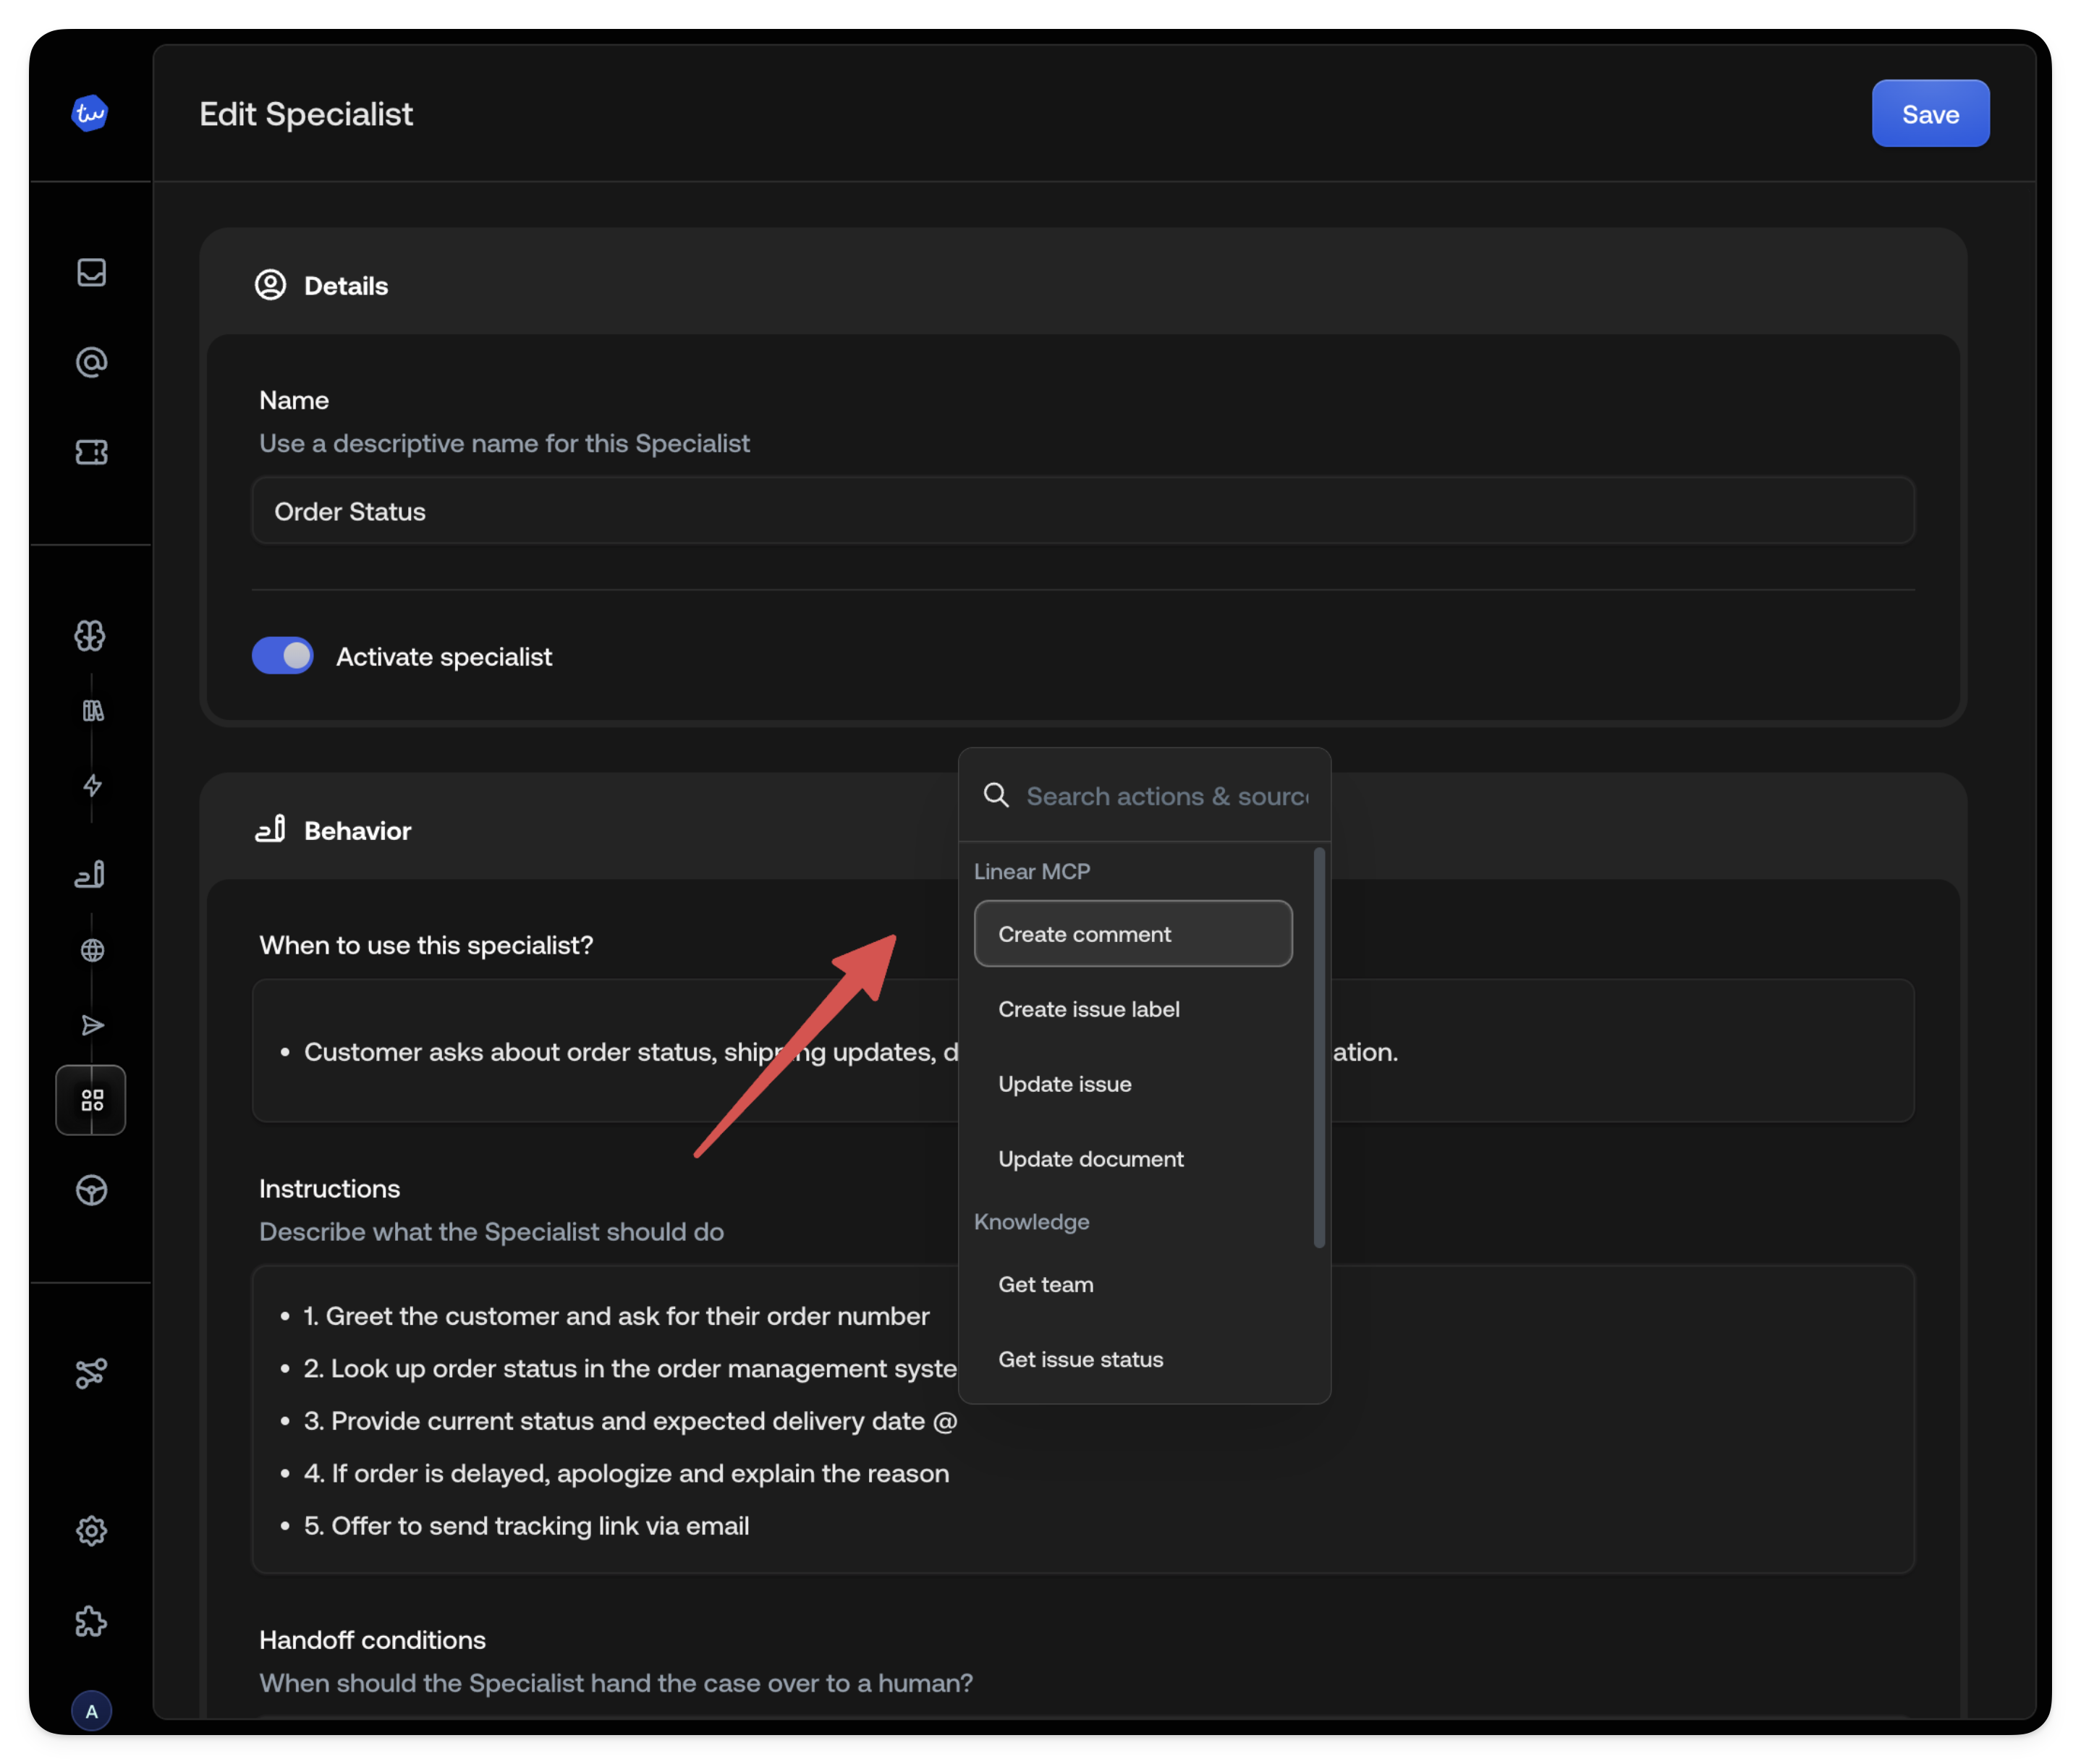
In the Instructions field, type
@to open the tool picker -
Select your action. It appears as a visual pill in the instructions.
See also
- AI actions: Execute through integrations
- Manual actions: Human Agent execution
- Security & verification: The trust model behind input customization
- Context Variables: Declare context variables and customize action inputs