

- The filters applied to the ticket list
- Which columns are shown or hidden, and their order
- The sort field and direction

You set the columns from the column menu, the pencil icon at the top-right
of the table, and reorder them by dragging column headers. See column
visibility and
reordering for details.
Personal and shared views
Only admins can share a view. Without the admin role you don’t see the Shared
view toggle, so every view you create is personal.
Admins can share a view with any team in your company, including teams they
aren’t in. An admin who isn’t in any of a view’s teams, and didn’t create it,
doesn’t see that view, so they can’t edit or delete it.
A view shared with teams follows team membership. Add a person to one of its
teams and the view appears in their tabs. Remove them and it disappears, unless
they created it. A team’s workspace assignment doesn’t narrow who sees the view.
Shared views show a people icon on their tab. Hover the icon to see who the
view reaches:
- Shared with everyone in the company
- Shared with 1 team, Shared with 2 teams, and so on
- Shared with no teams, so nobody else sees it, while you’re editing the view and haven’t picked a team, or after its last team was deleted

When a team or user goes away
- A team is deleted. Views shared with it stay shared with their other teams. A view whose last team is deleted reaches only the person who created it, or nobody if they’ve been removed. It never falls back to everyone in your company. Saving it again requires picking at least one team.
- A user is removed. Their personal views are deleted. Shared views they created stay shared with the same people.
- A user’s role changes. Their views don’t change. An admin who moves to the Agent role still sees the shared views they created, but can no longer edit or delete them.
Creating a view
1. From the tabs
Click Add view at the end of the tab row. If the row is full, it’s in the More menu. This creates a personal view right away, named View 1 or the next unused number, with no filters and the default columns and sort. The editor opens with the name selected, so you can type over it. A new view saves itself. Set up its filters, columns, sort, and name, then click Close. Switching to another tab or leaving the page saves it too, so there’s no Save button while you set it up. A new view won’t save while its name is over 100 characters, or while it’s shared with teams and none is picked. Open it again to fix that and save.2. From filters on All tickets
Add a filter on the All tickets tab, and a Create view button appears next to the filters. Click it to save your current filters, columns, and sort as a new personal view, named View 1 or the next unused number. The new view opens in the editor and saves itself the same way. Your All tickets filters, columns, and sort go back to the defaults. Reset, next to Create view, returns your filters, columns, and sort to the defaults without saving a view, and clears the search field.3. By asking the AI Operator
Ask the AI Operator (Nova) to create the view for you, for example “Save a view of urgent unresolved emails”. Nova sets up the filters and saves the view. It can share the view with everyone or with teams you name, and open it for you. A view Nova creates is personal unless you ask Nova to share it. If you aren’t an admin, Nova can’t look up, create, or change views.Naming and sharing
The editor below the tabs holds the view’s name and, for admins, its sharing:1
Name the view
Type in the Add view name field. A name can be up to 100 characters.
2
Share the view (admins only)
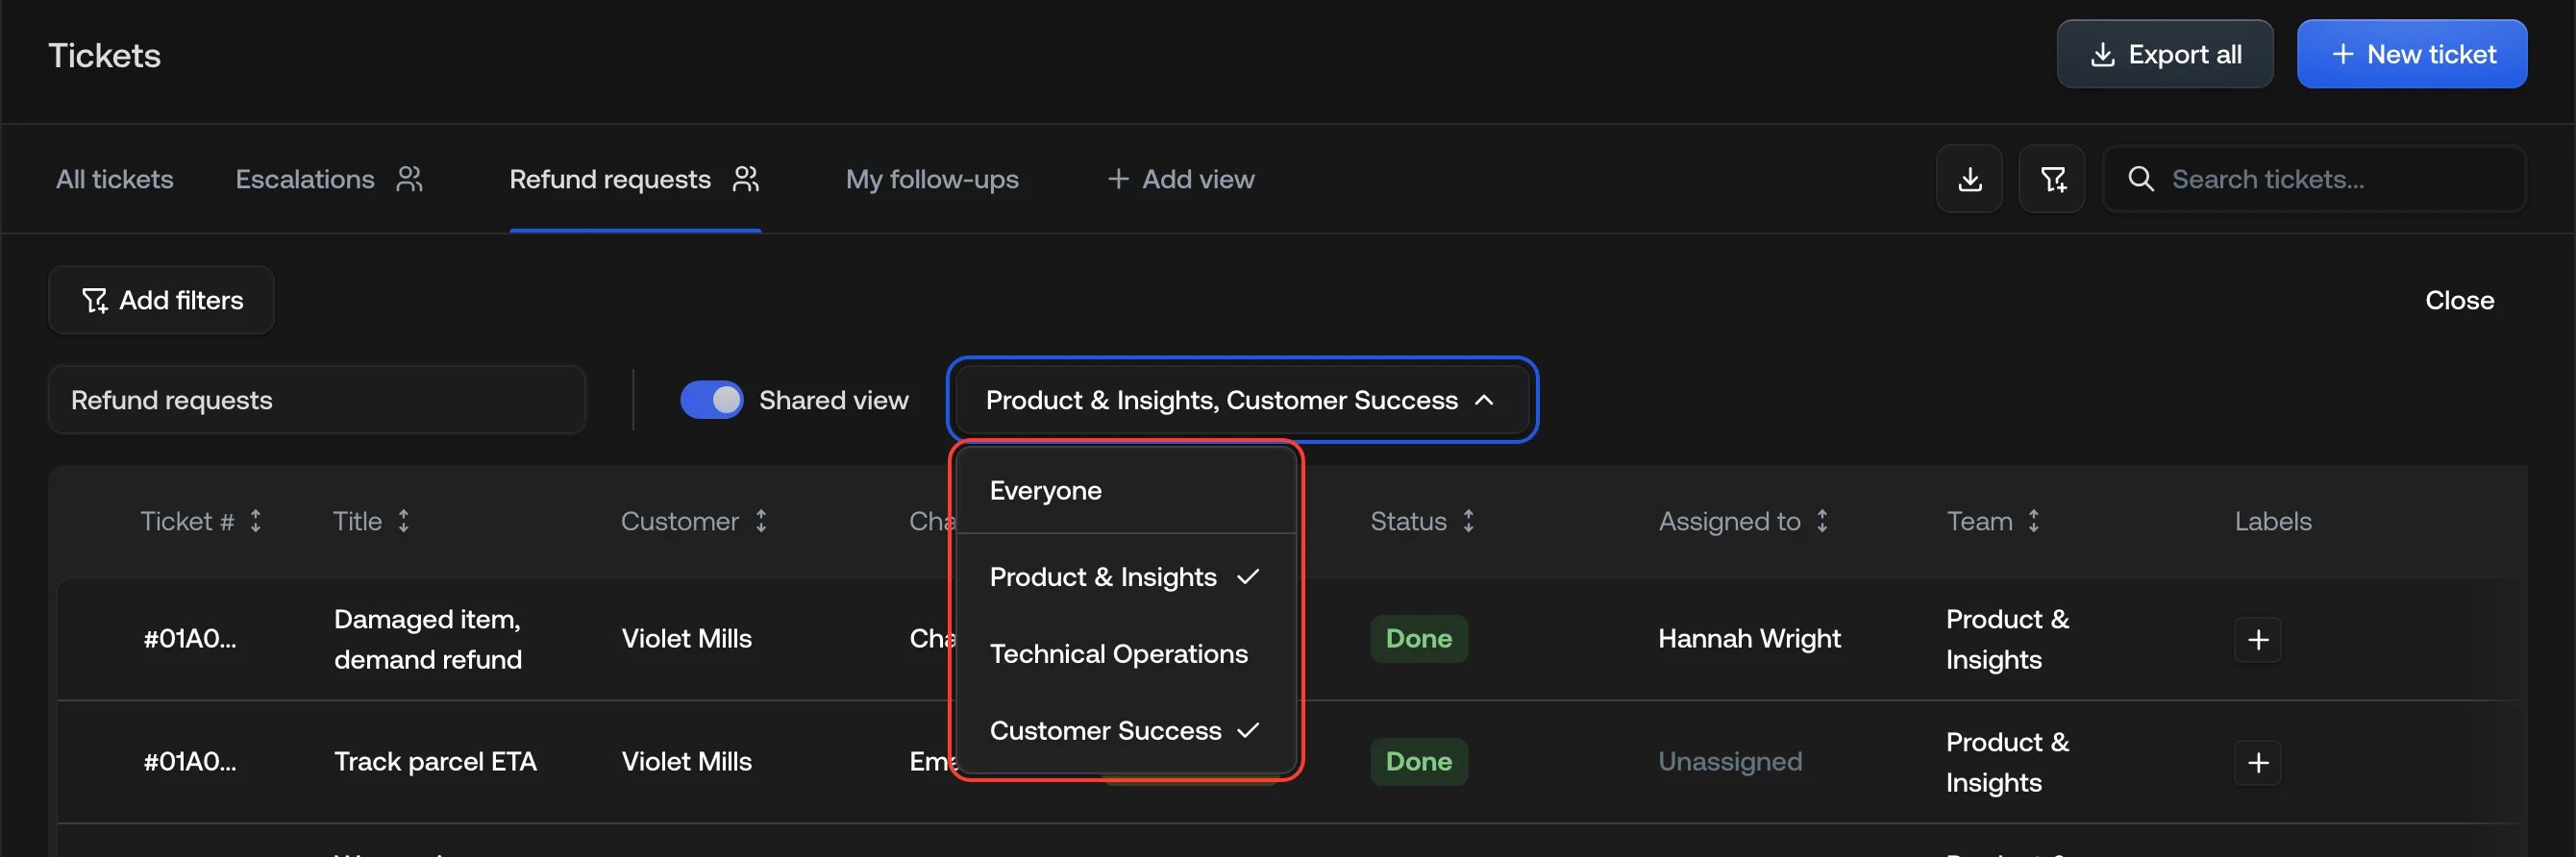
Turn on Shared view. The view is shared with everyone, and a picker
labeled Everyone appears next to the toggle. Turning the toggle off
makes the view personal again and clears any teams you picked. The toggle is
locked on a view someone else created.
3
Pick teams (optional)
Open the Everyone picker and select teams. While Everyone is
checked, every team shows as checked too, and selecting one shares the view
with only that team. Unchecking Everyone clears the selection, and the
picker reads Pick teams until you choose one. Checking Everyone
again also clears the teams you picked.
4
Save
For a view you just created, click Close. For an existing view, click
Save, then Update this view.

Editing a view
Open a view’s tab, then adjust its filters, columns, or sorting. Adding a filter from the filter menu also opens the full editor, including the name field. Changing only the columns or sort doesn’t open the editor, so Save doesn’t appear. To save that change, choose Edit from the tab’s ⋮ (kebab) menu. On a view you can’t edit, adding a filter is the only way to open the editor. With unsaved changes, what you can do depends on whether you can change the view:- Your personal views, and every shared view in your tabs if you’re an admin: Save gives you two choices. Update this view overwrites the saved view with your current changes. Create new view saves your changes as a new view and keeps the original untouched.
- Shared views, if you aren’t an admin: only Create new view appears.
- View name cannot be empty
- View name cannot exceed 100 characters, also shown while you type
- Pick at least one team, when the view is shared with teams but none is picked
Unsaved changes
If you tweak a view but don’t save, your changes, including a new name or sharing setting, are kept in this browser. They survive a reload, but nobody else sees them, and they don’t follow you to another browser or device. Coming back to a view whose unsaved changes include filters, its name, or sharing reopens its editor. If you only changed the sort or columns, the editor stays closed. Use Reset to discard your changes and return to the view as it was saved. It asks you to confirm with Discard changes first. If the saved view changes while you have unsaved changes, for example when an admin updates a shared view or a label its filters use is deleted, your changes are discarded the next time your views load. If that view is open, you see This view changed elsewhere, so your unsaved changes were discarded.Arranging your tabs
Drag a tab by its name to move it, or hover the tab, click its ⋮ menu, and choose Move first, Move left, or Move right. You can move every view, including shared views you can’t edit. All tickets always comes first, and you can’t move or delete it. Dropping a tab on it moves that tab to first place. Tab order is stored in this browser, not in your account, so it doesn’t follow you to another device. Nobody, including admins, can set the tab order for other people. Until you move a tab, the default order is shared views first, then personal views, each group oldest first. Tabs that don’t fit in the row collapse into a More menu. The view you have open always stays in the row.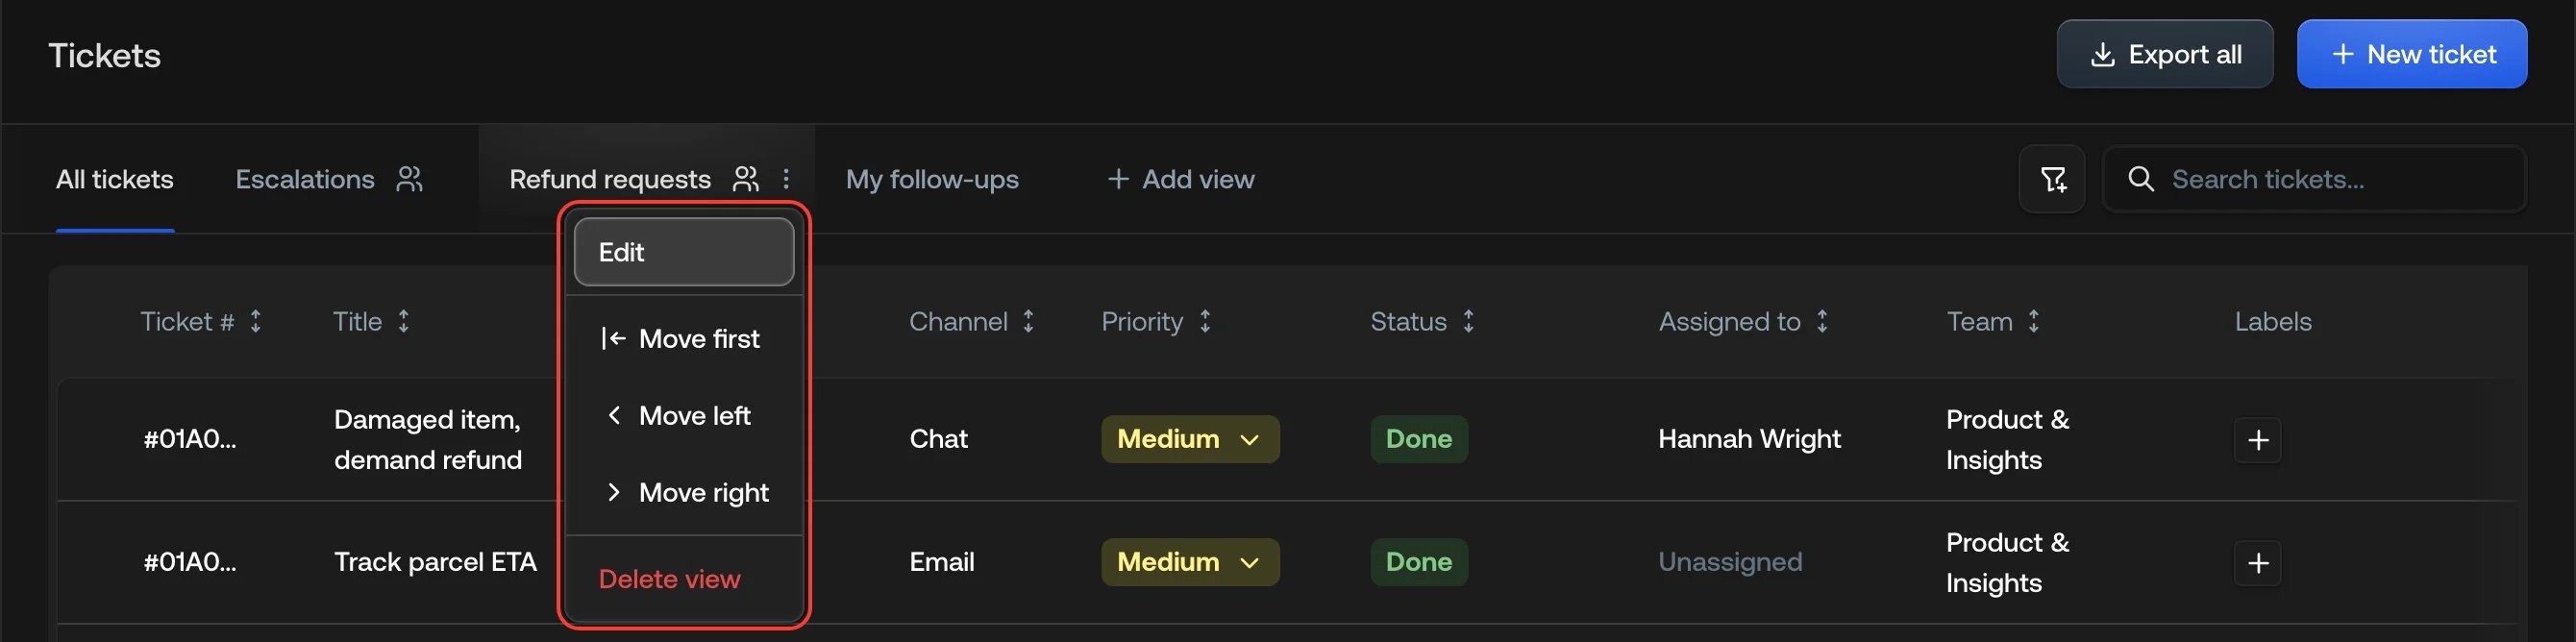
Opening a view from a link
Each view has its own address:/tickets?viewId= followed by the view’s ID.
Bookmark it or send it to someone. Anyone who can see the view lands on it.
Anyone else, or anyone opening a link to a deleted view, sees View not found
and lands on All tickets.
Exporting a view
Admins can download the tickets in a saved view. Open the view and click the download icon in the tab row, whose tooltip reads Export view as xlsx. The file,tickets-export-YYYY-MM-DD.xlsx, holds the tickets that match the view’s
current filters, sort, and search, including changes you haven’t saved.
The file has the same columns whatever the view shows, and holds up to 10,000
tickets. Export all at the top of the page downloads the same file without
any filters.

Deleting a view
1
Open the tab menu
Hover the view’s tab and click its ⋮ menu. If the view is in More,
open it first.
2
Delete the view
Select Delete view, then confirm with Delete view.
See also
- Tickets: searching, filtering, and column visibility on the ticket table.
- Inbox: the prioritized queue of tickets that need your attention.
- Team Management: the teams you can share a view with.